My YouTube Studio Flooded. I re-built it in a Closet.
My YouTube studio flooded, so I rebuilt it in a closet?
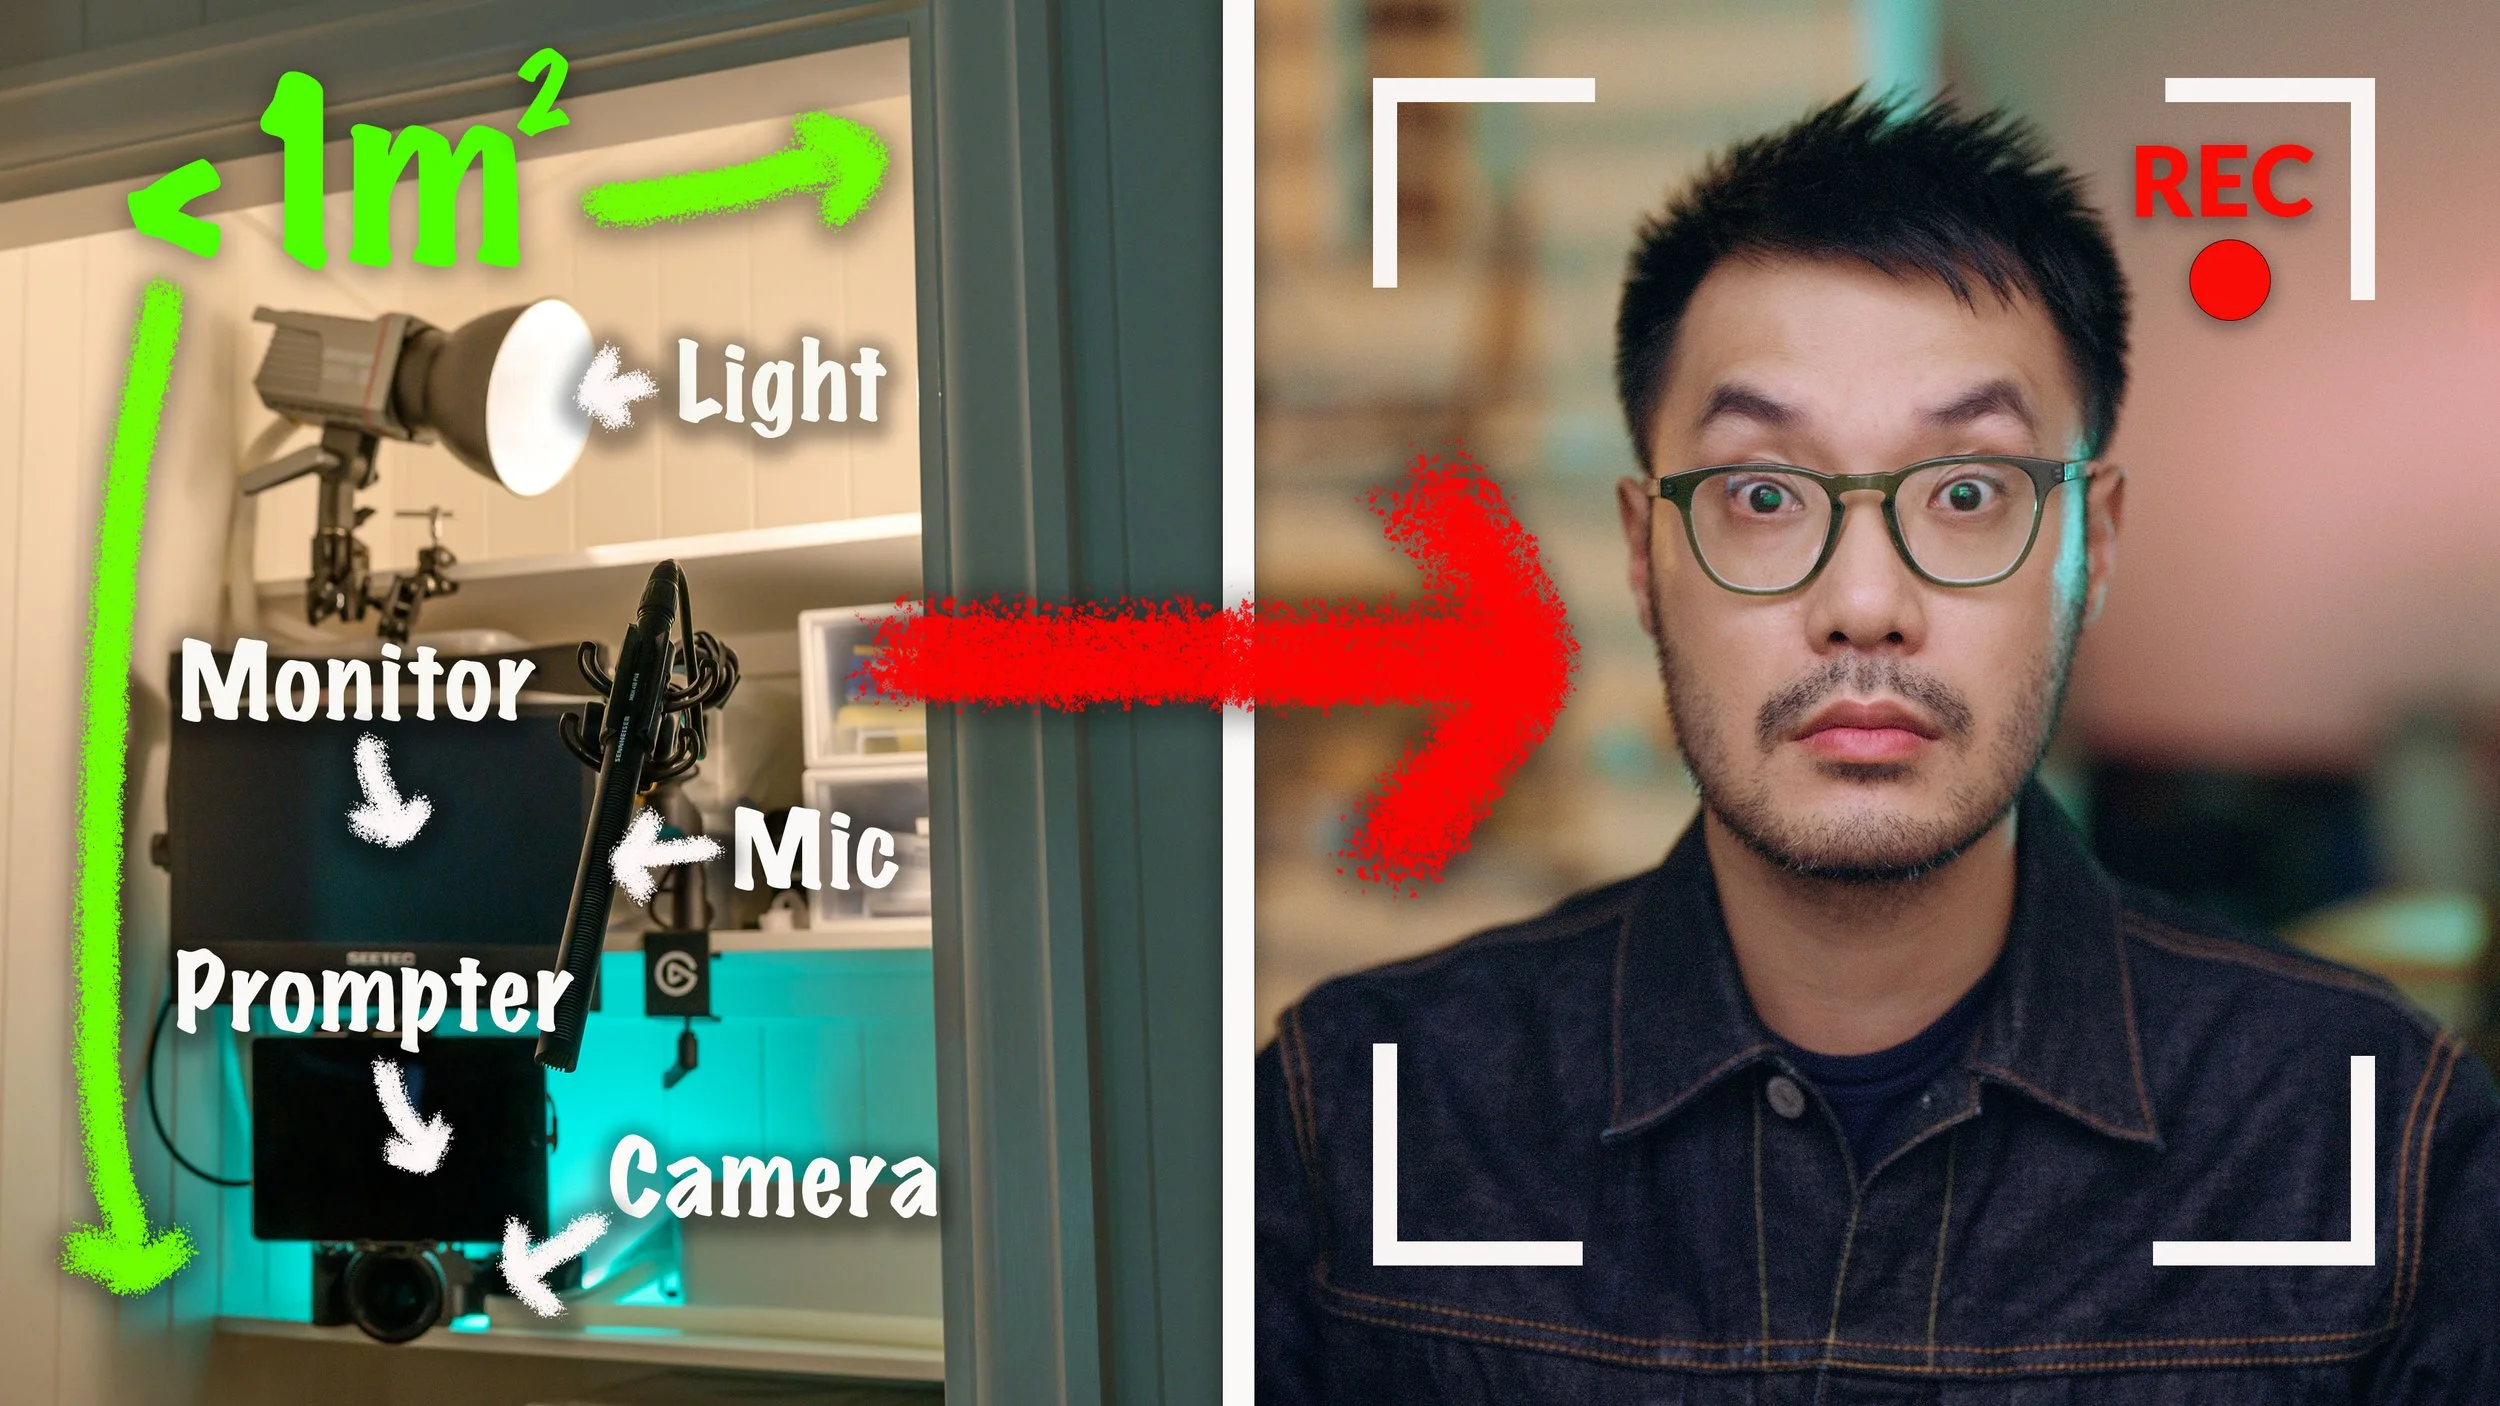
All my lights, cameras, monitors, and mics fit into this tiny space, and there’s still half the closet left over? I use this for everything from Zoom calls, online classes, to eCommerce product photography, you don’t have to be a YouTuber to get the most from this setup.
Everyone, especially if you work from home - can do with more space.

When my YouTube studio flooded last month I nearly quit.
It was just too hard to find the time for YouTube alongside my day job and all those repairs. The biggest hurdle for filming was simply there was no where to put all that gear, which makes every new package I get in the mail hard to manage. But this is a common trap with work from home setups:
Assuming space - or a lack of it - is what’s holding you back, when in fact it is the light.

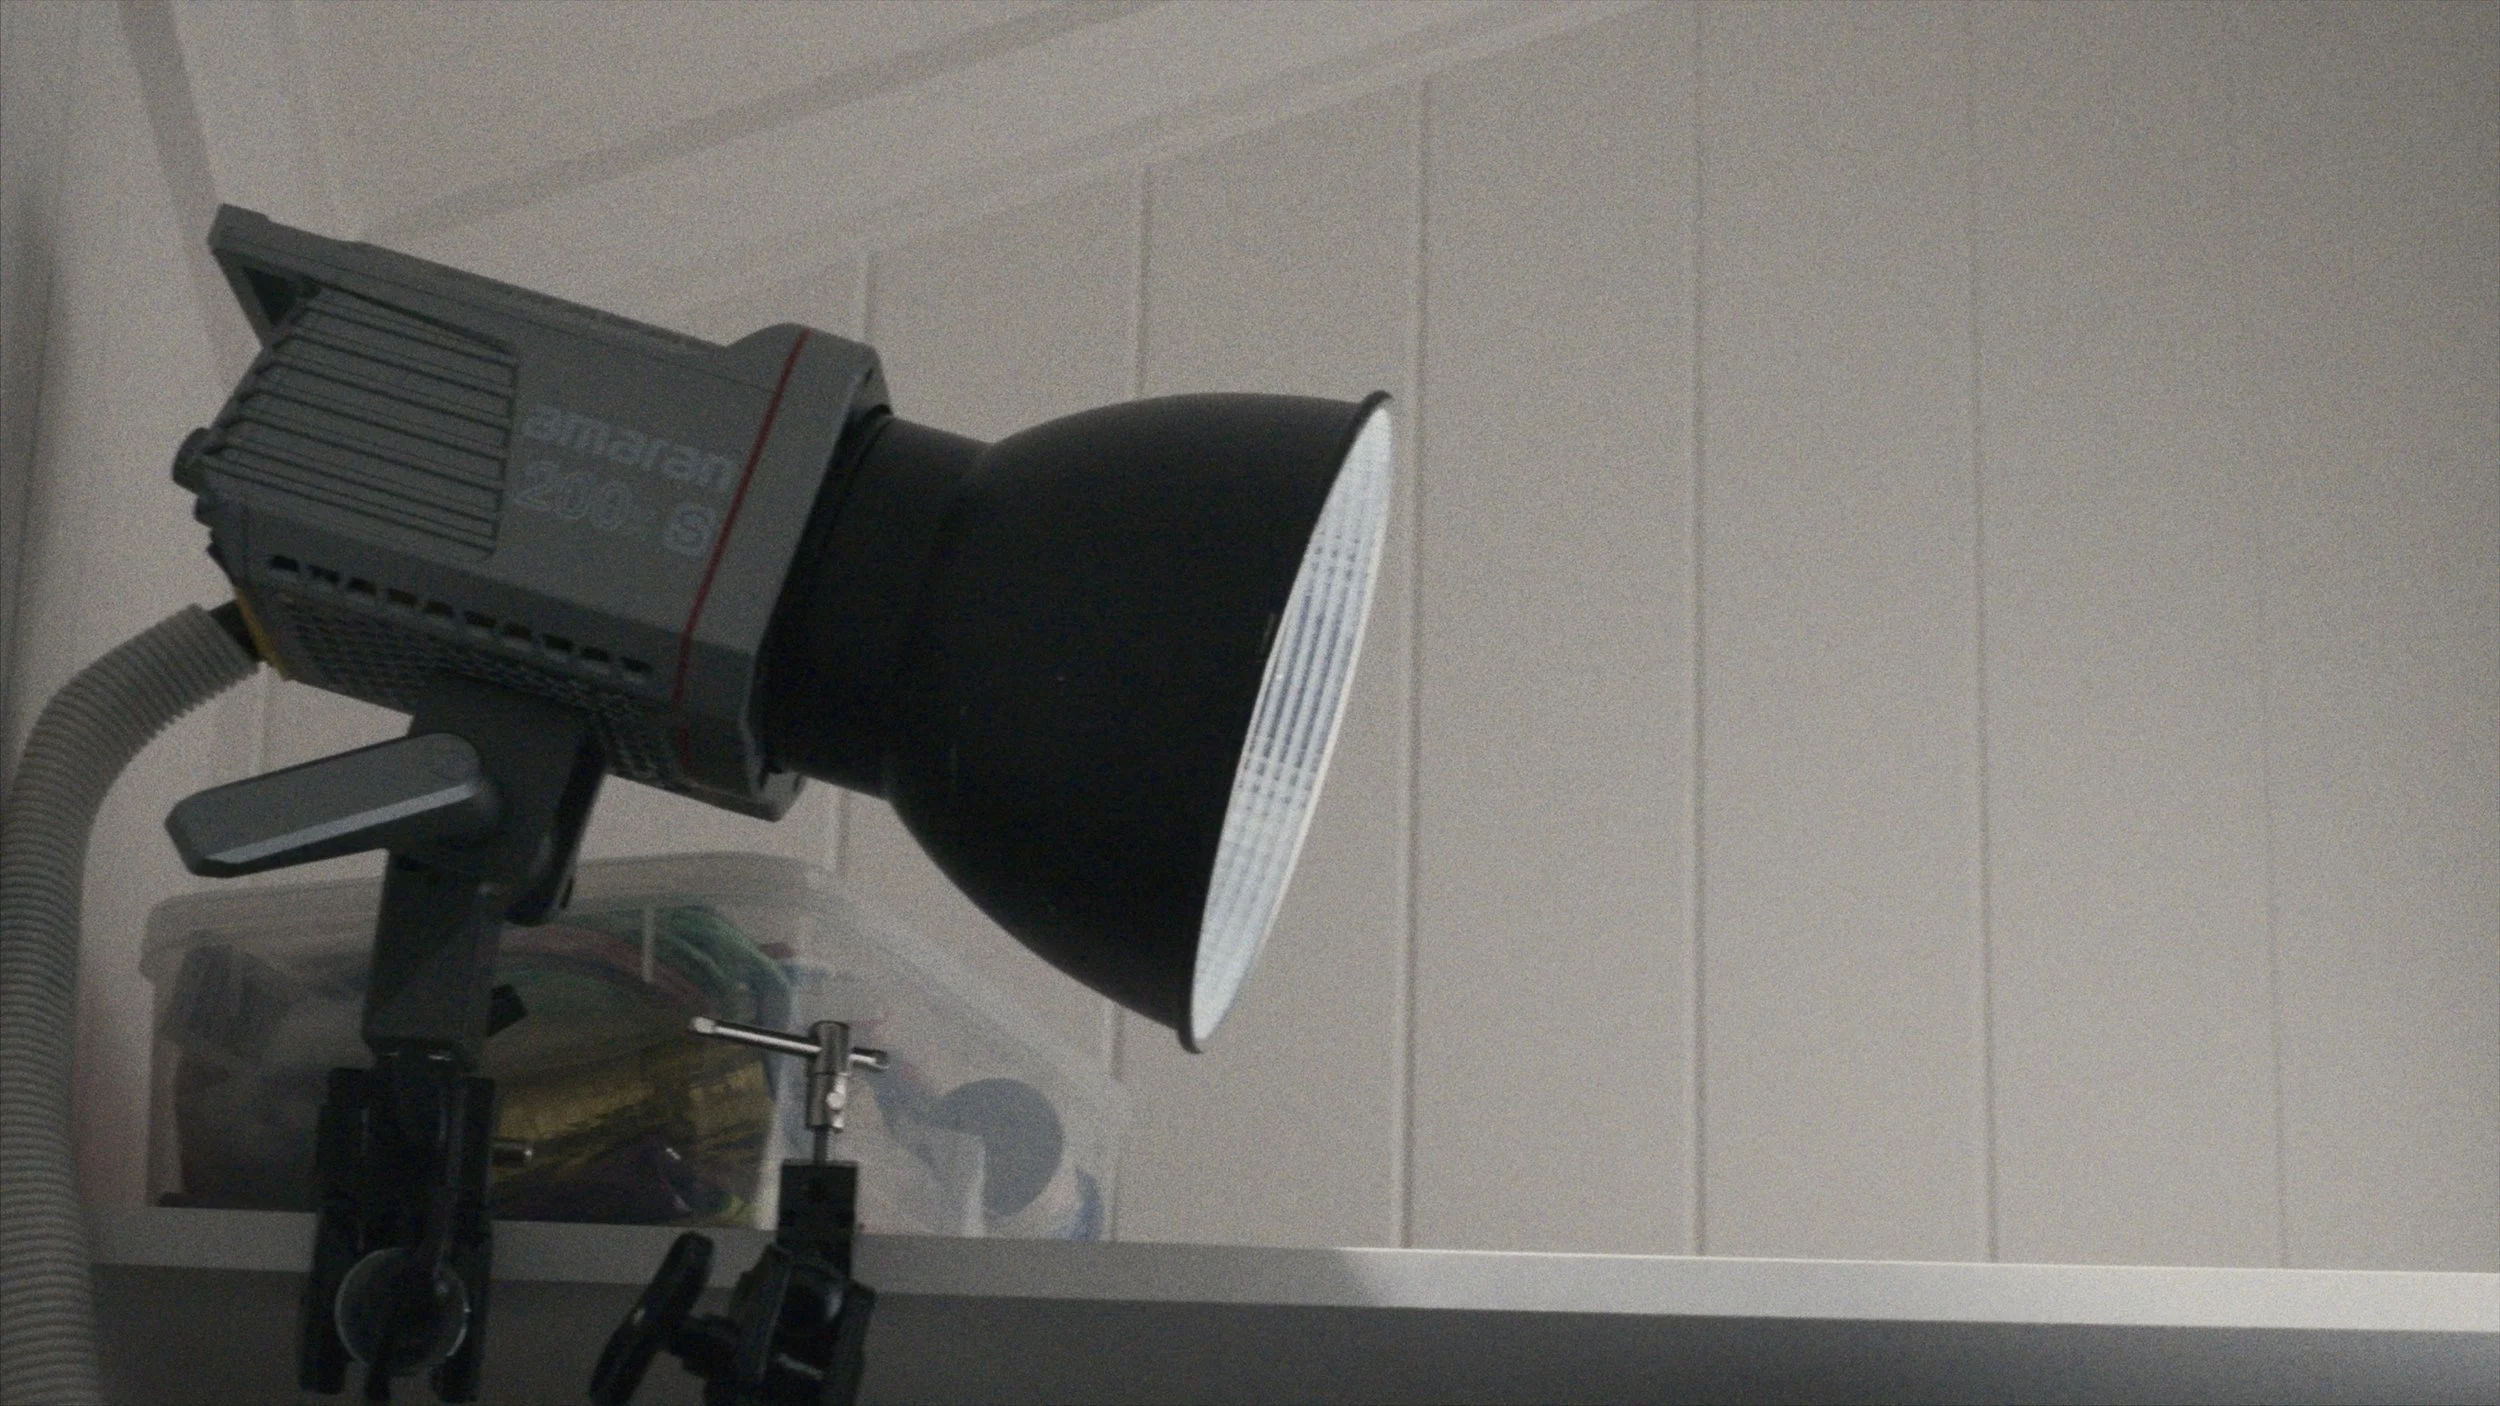
You need big soft light sources, not just to keep the space bright and airy, but for webcams, zoom calls, and any kind of creative work. Natural light is fantastic but it’s not much help at night. The most versatile fixtures are COB lights, super powerful, can shape the light to whatever you need, but by the time you add a light stand and modifiers like this massive light dome it takes up too much space. This is where closets come in handy, they have built in shelves and rails to clamp things to and keep things off the ground.
I bought every single piece of gear in this video myself with my own money. This is not a sponsored post, but if you would like to support my work affiliate links for every item in this setup are listed below.
Why build a YouTube studio in a closet?
When I tried to do everything at 1 desk - “the ultimate desk setup” - there was no separation between productivity and filming. Everything was clamped to the desk and it was too cluttered for my liking. I also built an all-in-one rolling stand for all my gear, but I was scared of my toddler running into it and toppling it over, and it still took up too much space.
Space is what I don’t have right now, and the item that takes up by far the most space is the light.
This closet build fixes the problem:
LIGHTS:
Key light: https://geni.us/2cwqMZE
Background accent spotlight: https://geni.us/xsAxx
Tube light: https://geni.us/oRTMFw
Clamp: https://geni.us/tl4Y
AUDIO:
Shotgun mic: https://geni.us/euZdqD
Podcast mic: https://geni.us/ODZ1
Audio interface: https://geni.us/hqAFjfG
Mic arm: https://geni.us/wdNQ
XLR cables: https://geni.us/csAgwIY
LIVESTREAMS:
HDMI Capture card: https://geni.us/jKALPB
Monitor: https://geni.us/JICz
Battery: https://geni.us/GURKubp
CAMERAS
My Video Camera: https://geni.us/9zfT
A-roll lens: https://geni.us/E0BOl
B-roll lens: https://geni.us/fRFp
Camera for POV footage: https://geni.us/OSovmT
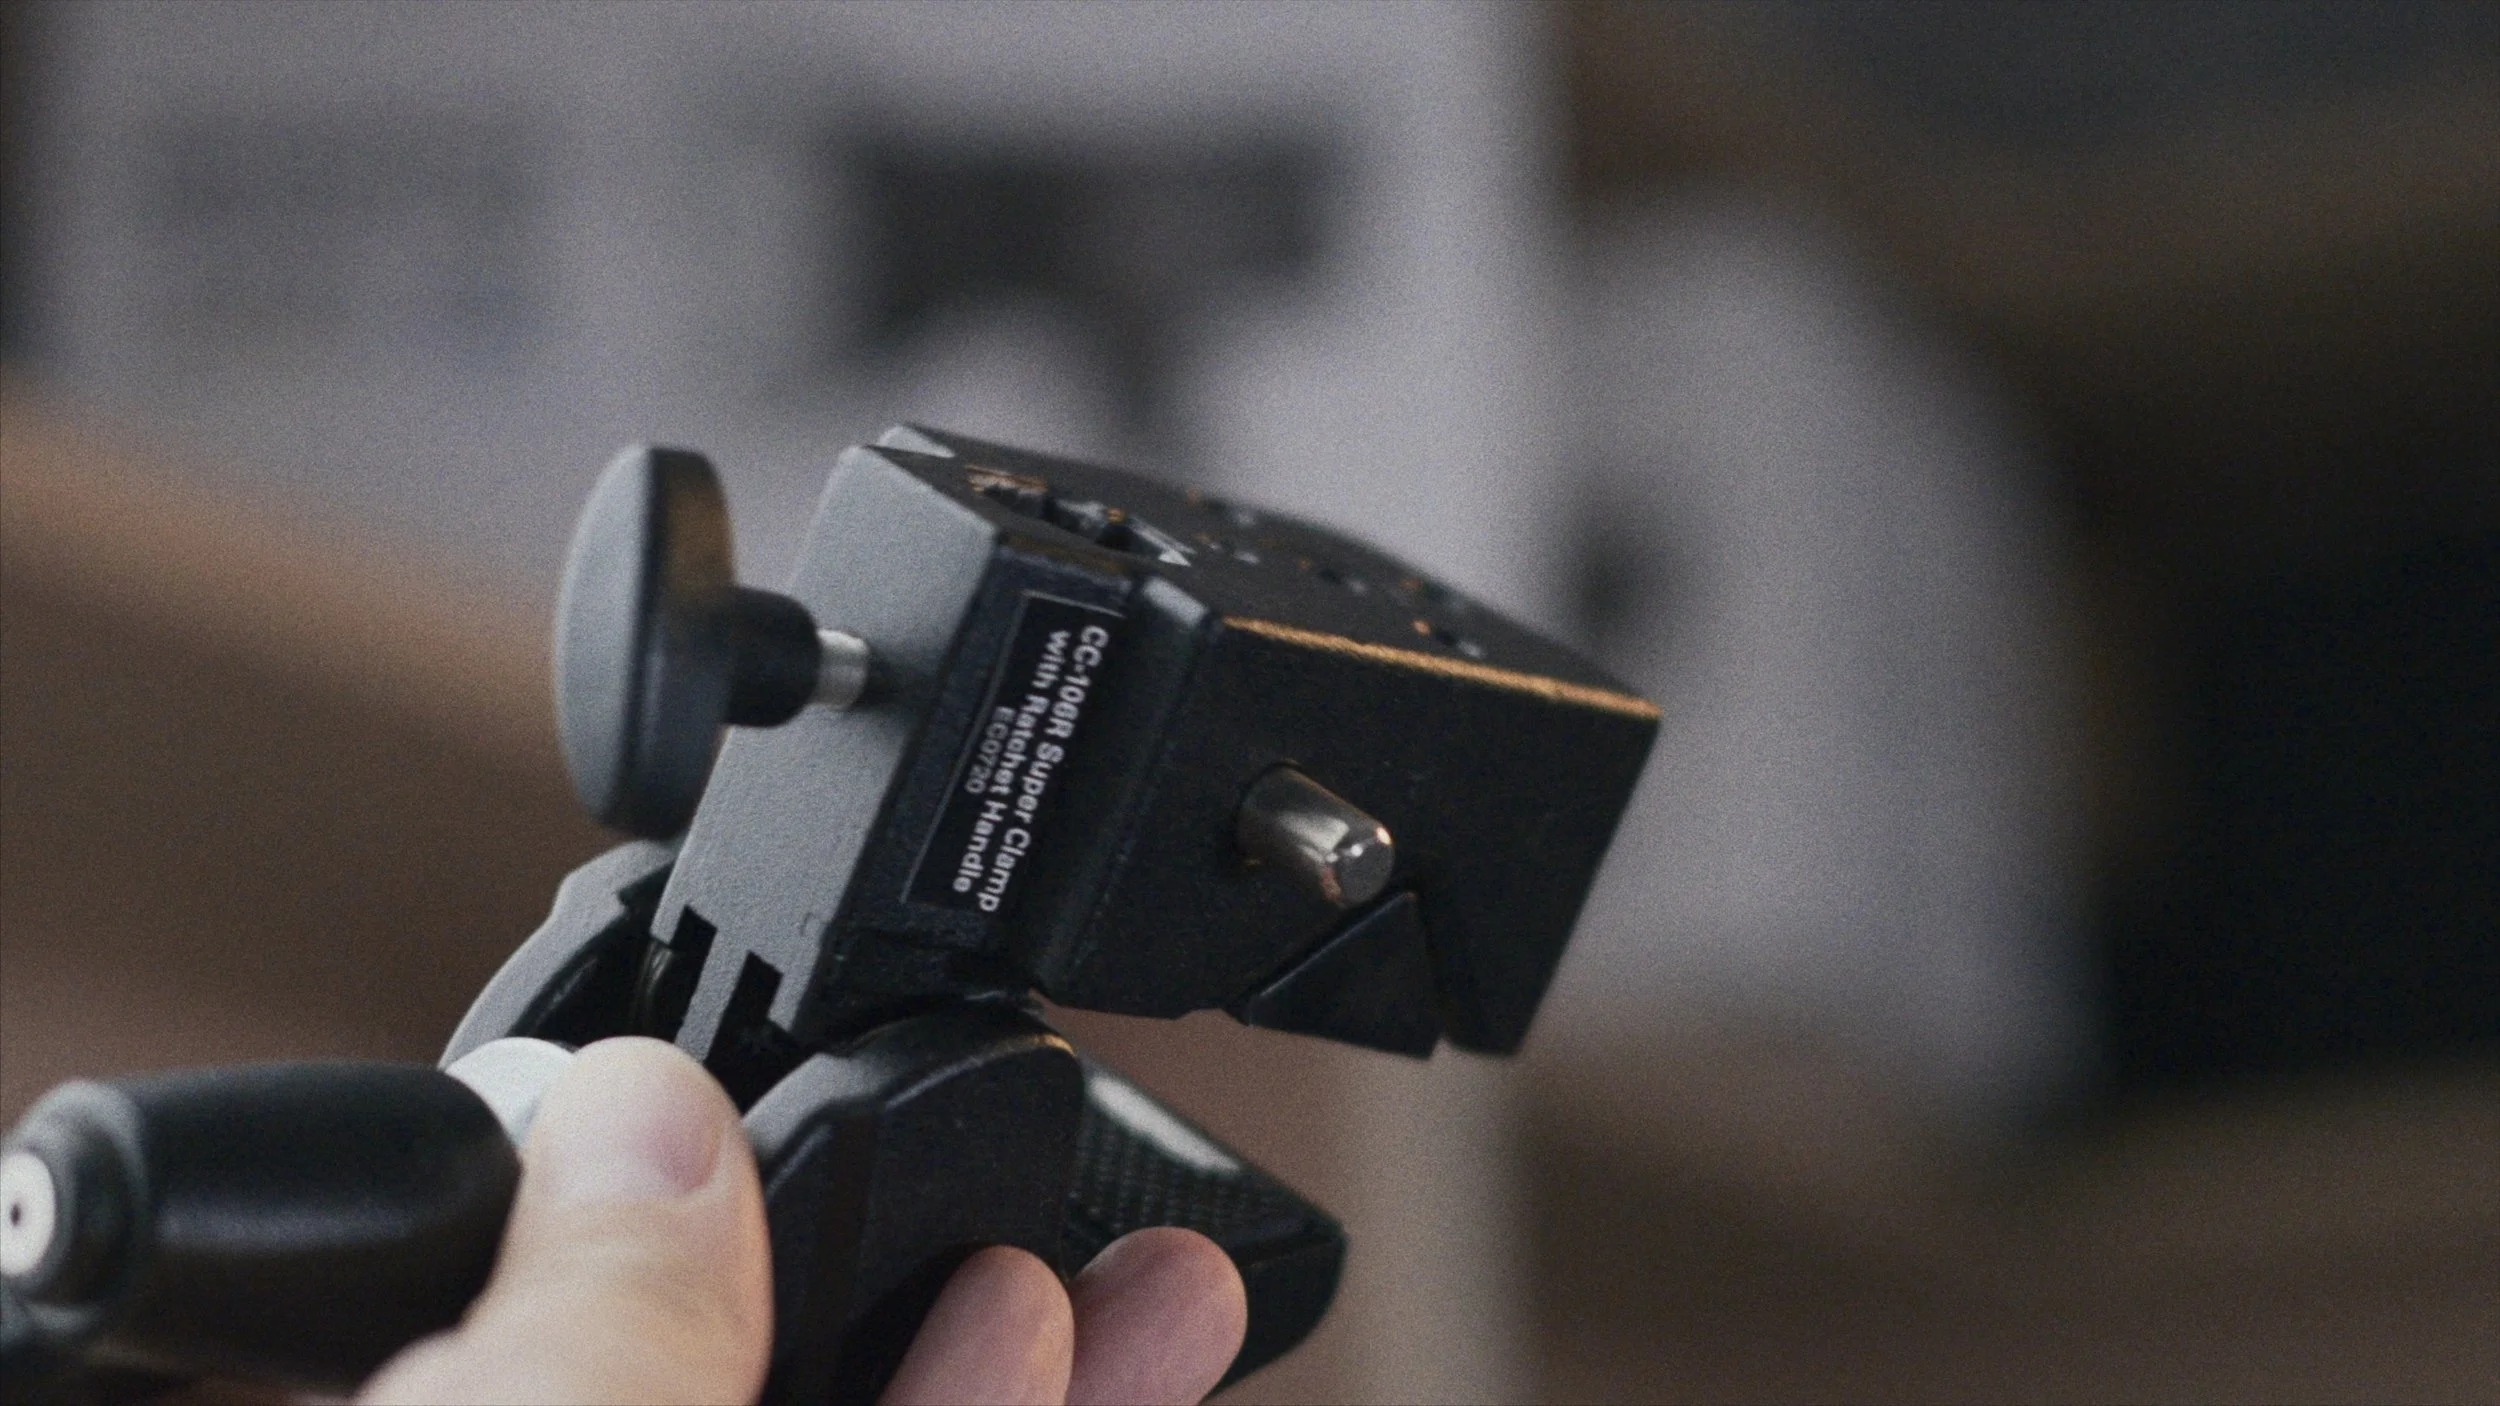
One clamp’s all you need.
If you mount a COB light on the top shelf, it turns the whole closet into a giant soft light source that doesn’t eat into the rest of the room. My closet is less than 1 meter squared, I can’t fit the massive light dome onto the light, but another way to soften light is to bounce it. With the reflector that comes with most light fixtures, I can bounce the light twice - once against the inside wall of the closet, the second time against the back of the closet door.
Each bounce softens and increases the size of the light source, my closet - and I think most closets - are painted white on the inside, the colour of the light won’t change much, so whatever’s in front of the closet will be lit with very natural soft light.
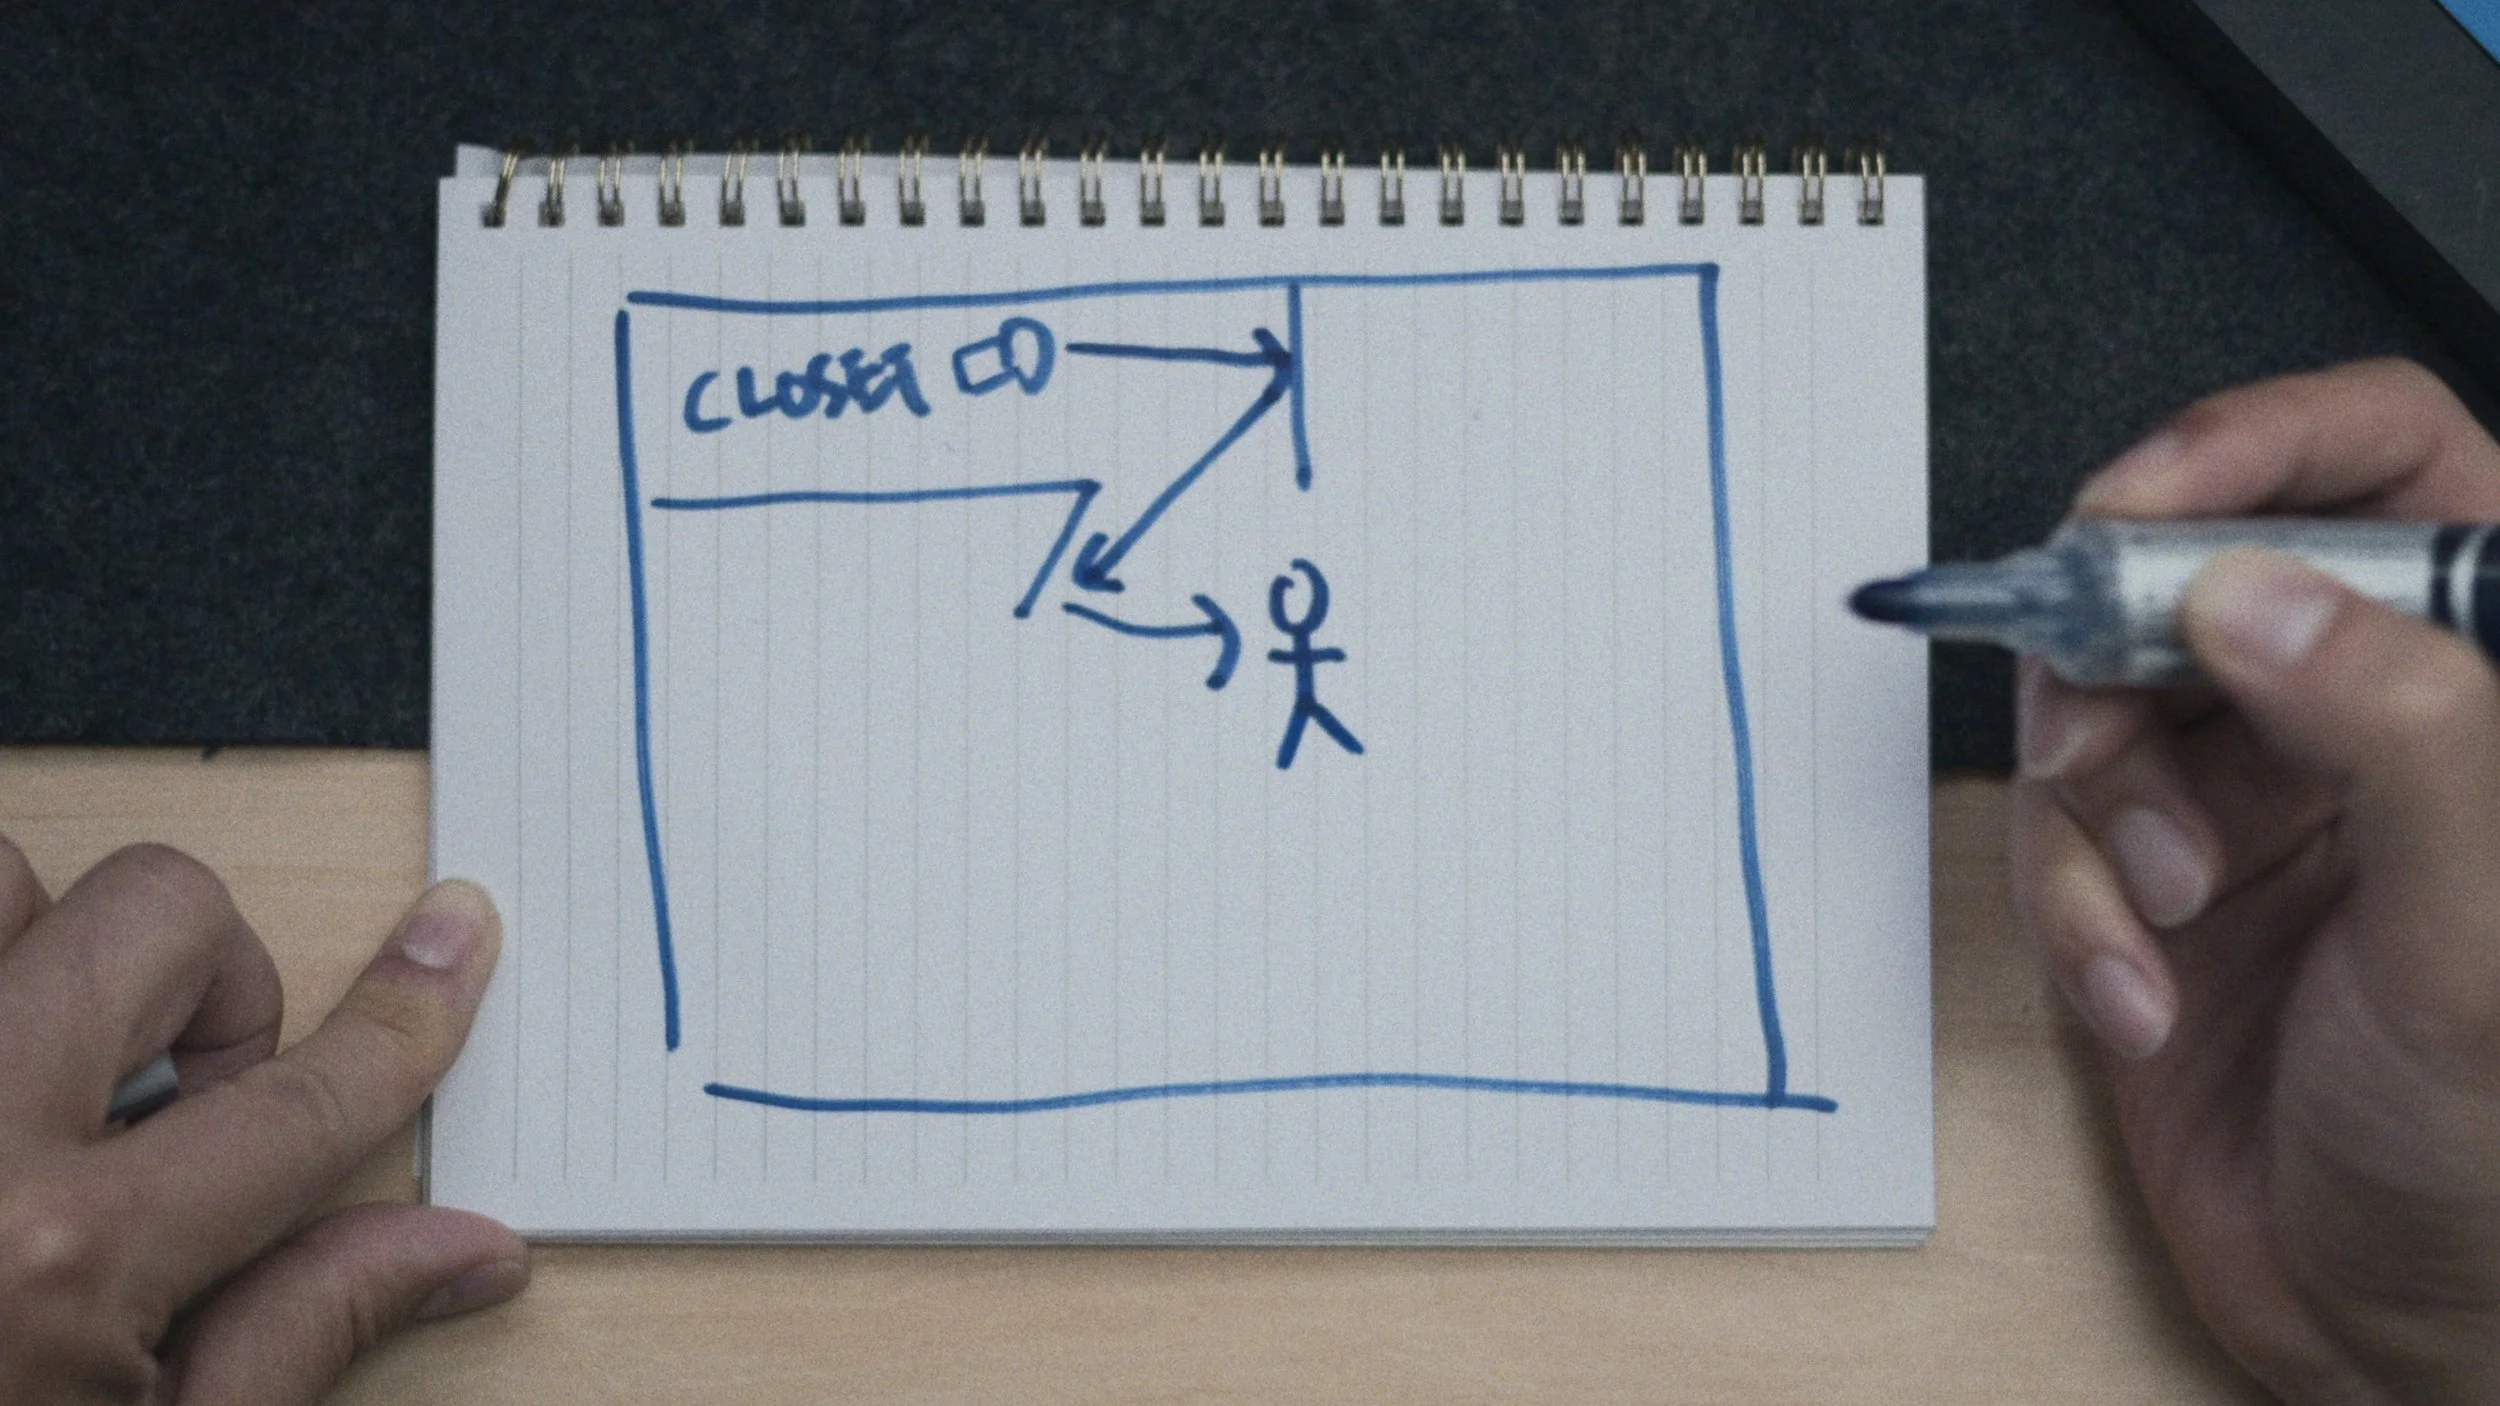
Bouncing light off the interior wall of the closet - it becomes larger and softer.
Totally up to you how to use this, and I’ll show you my 3 main use cases:
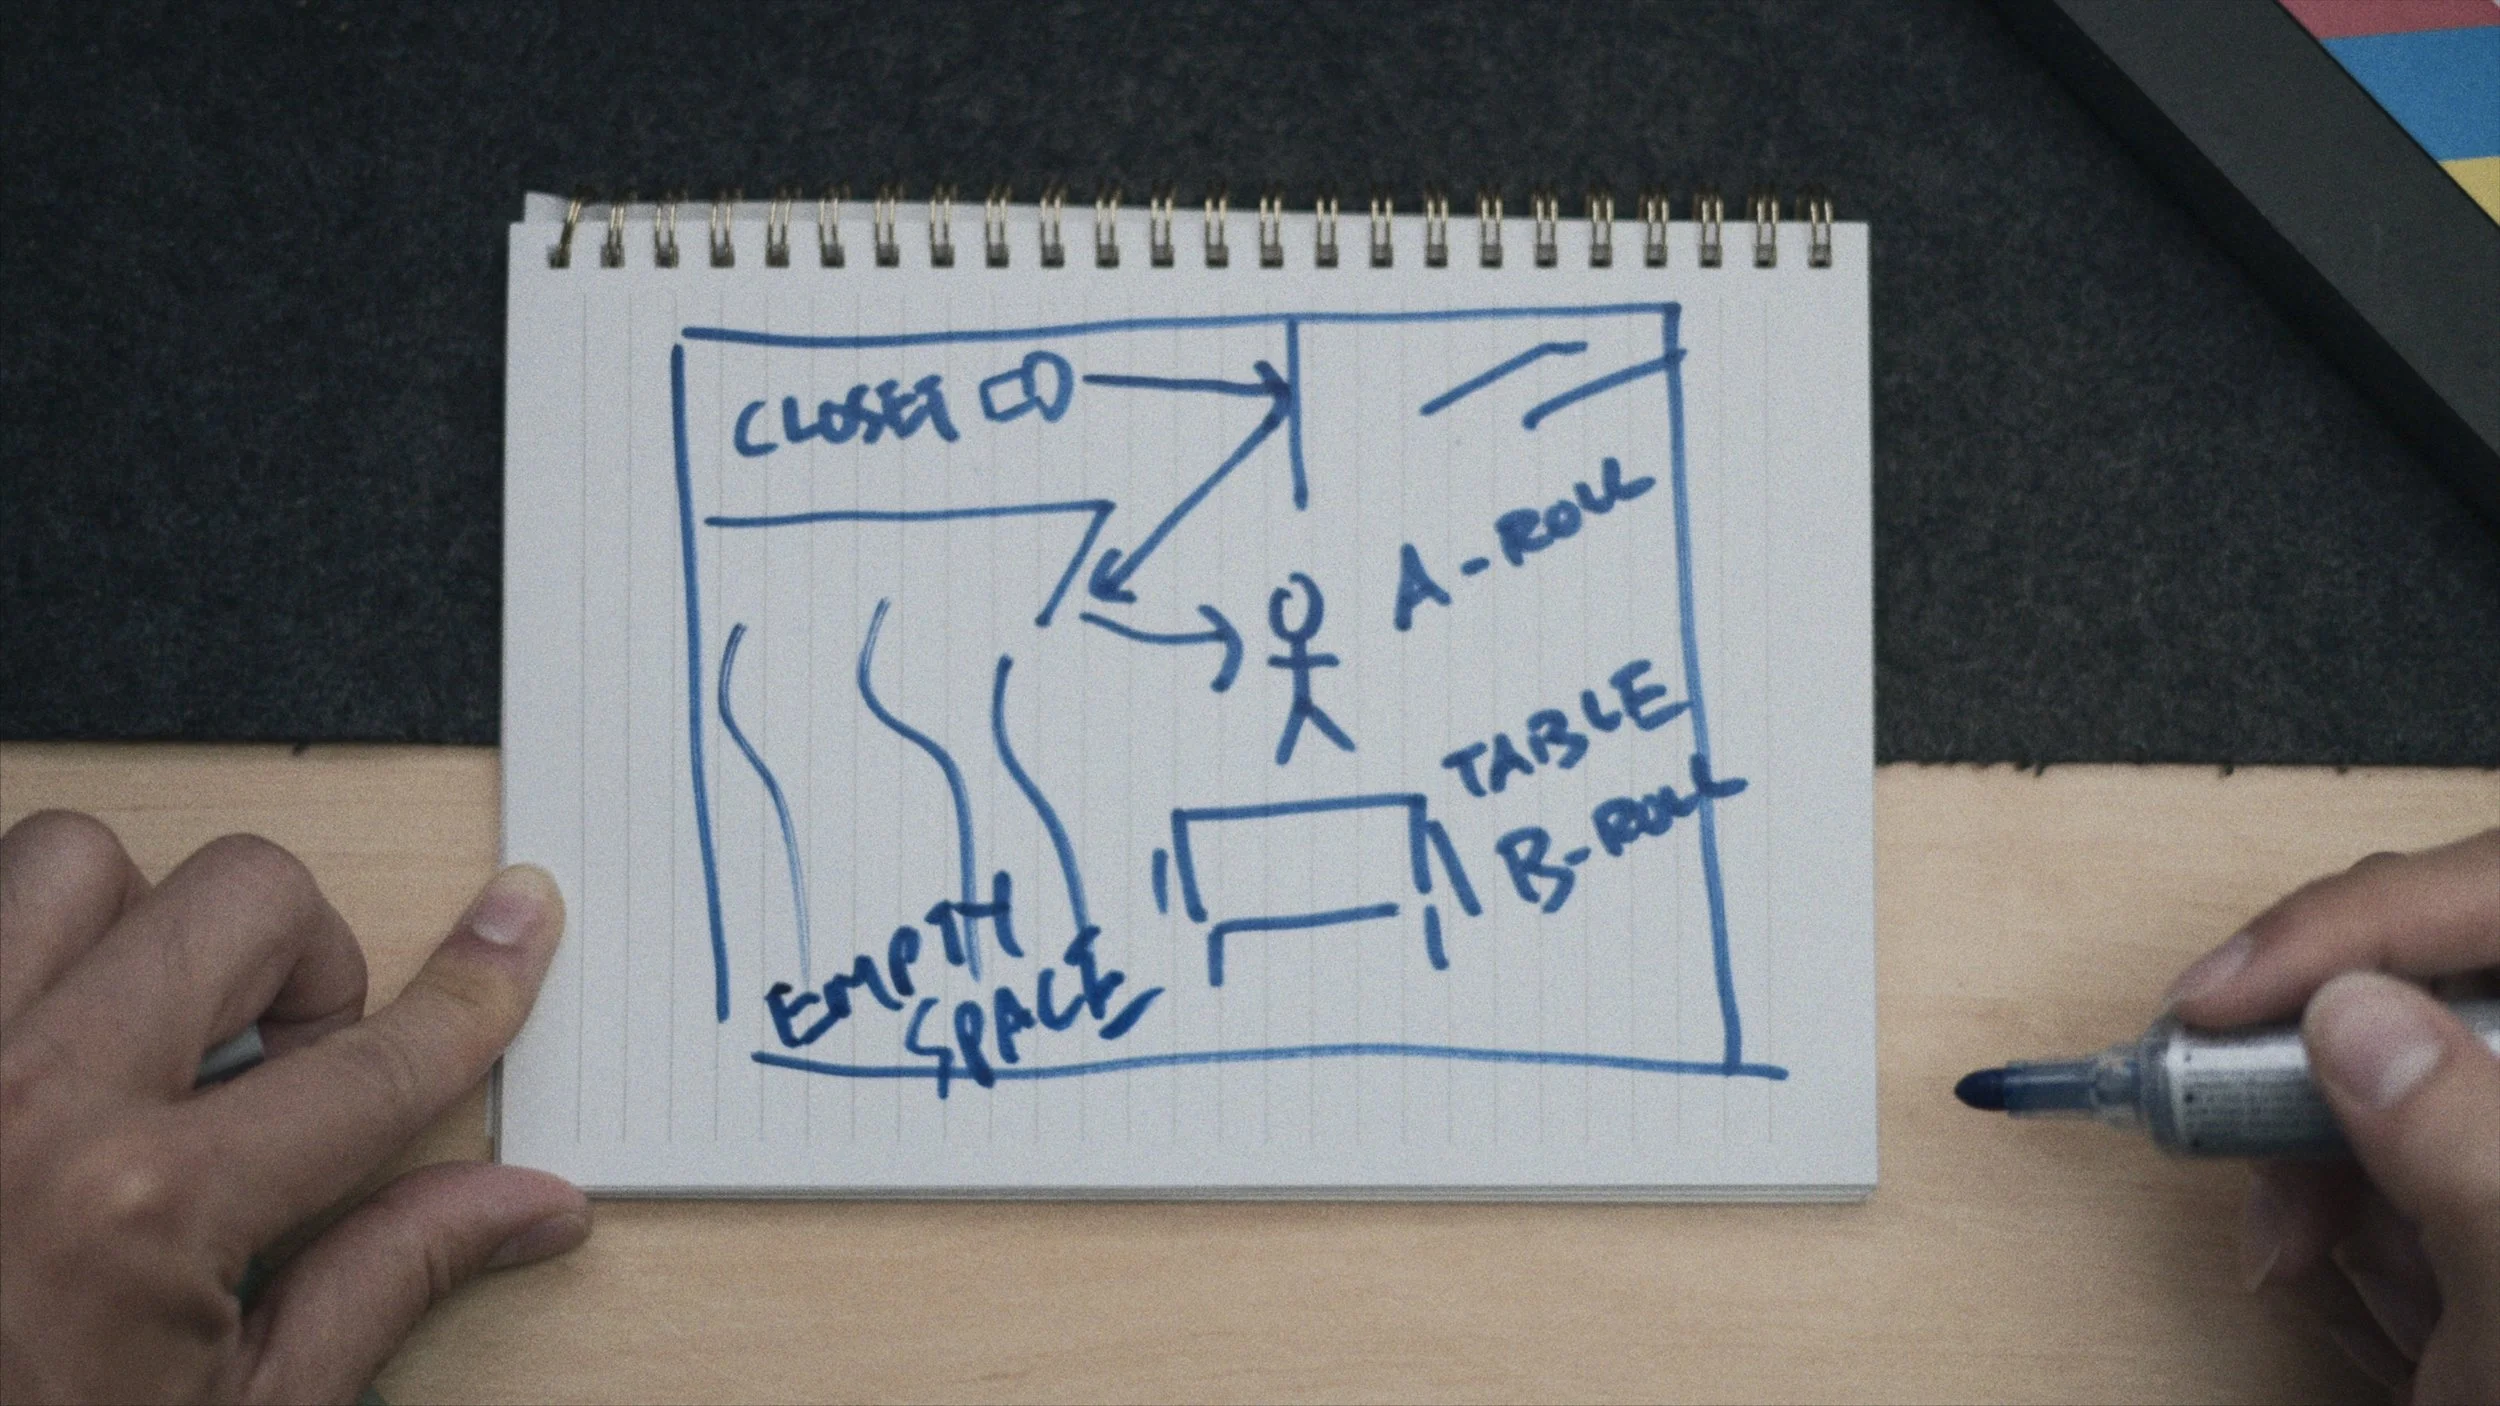
Use Case 1: Product Photography
Because the key light is recessed inside this closet, that gives me a lot more space in the rest of the room to work with, tweaking the framing, the set decoration, tones, colour of lighting.
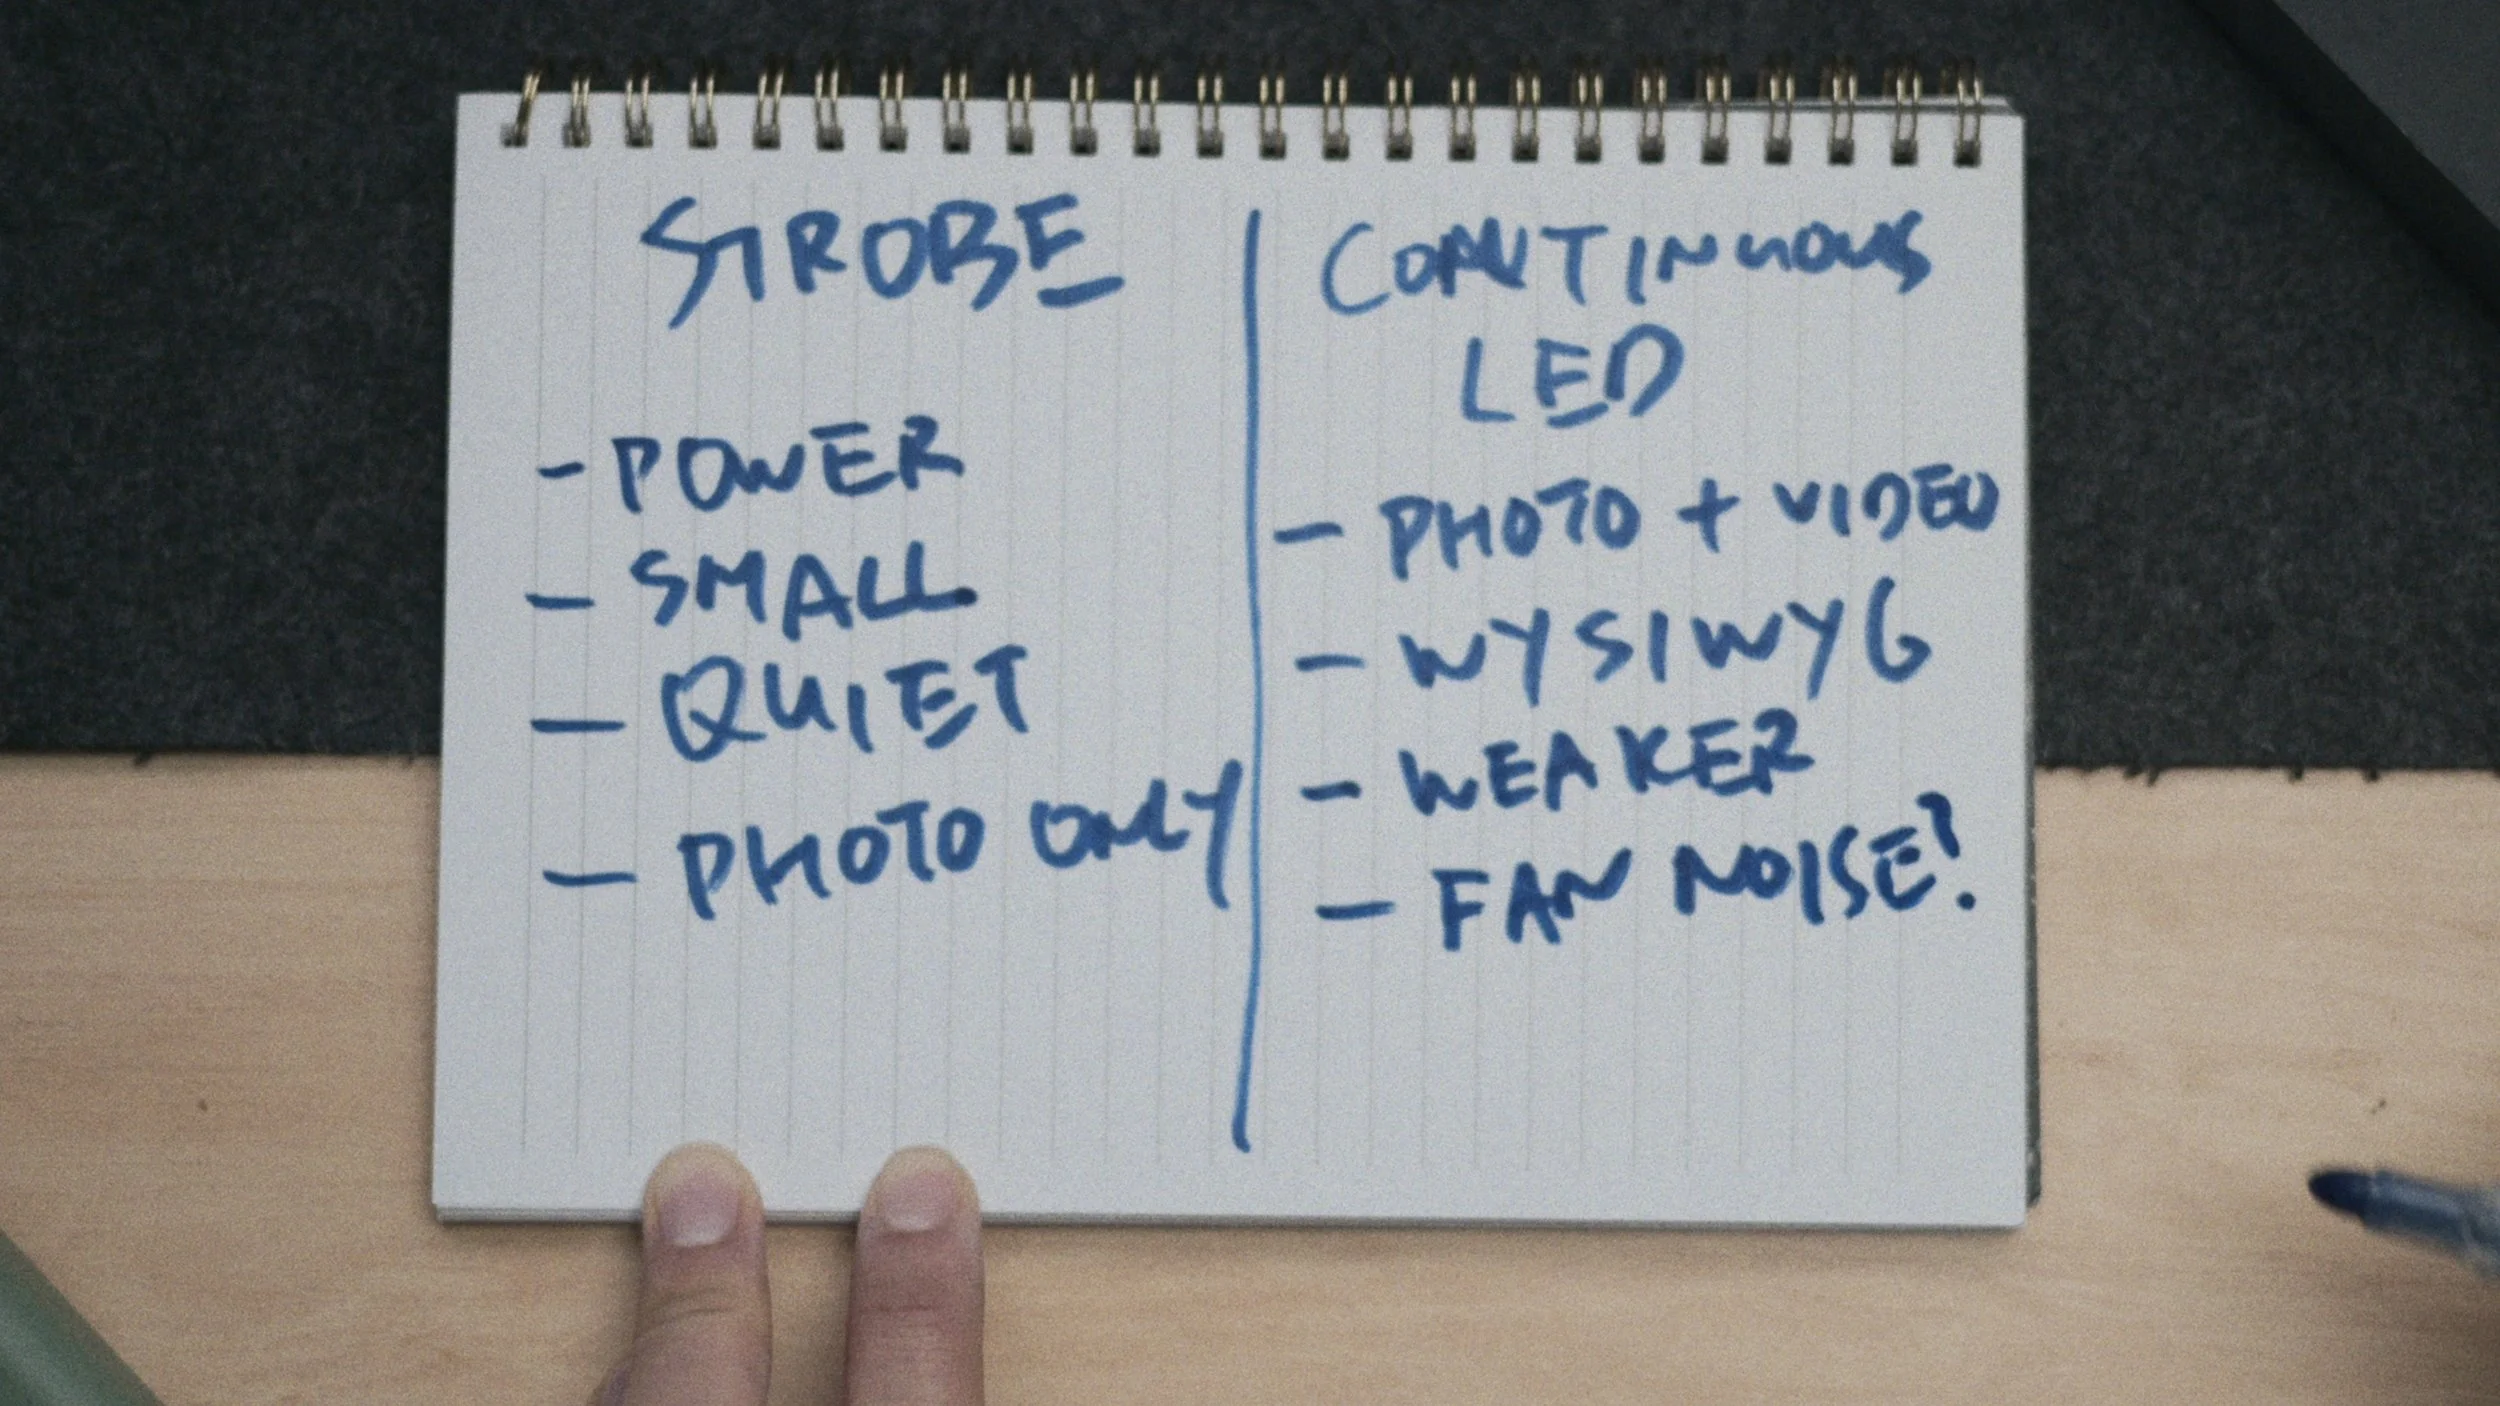
The main advantage of continuous lighting is that it’s continuous - the intensity doesn’t change, and what you see is what you get. You don’t need to tweak your camera settings once you dial it in at the start of the session. Continuous lighting isn’t as powerful as strobes, but if I increase the intensity it can overexpose this closet door evenly, which can serve as a minimalist backdrop for product photography.
The best part is when you’re done with the shoot just close the door, and it’s out of sight out of mind.
Before we get to my second use case a few quick tips:
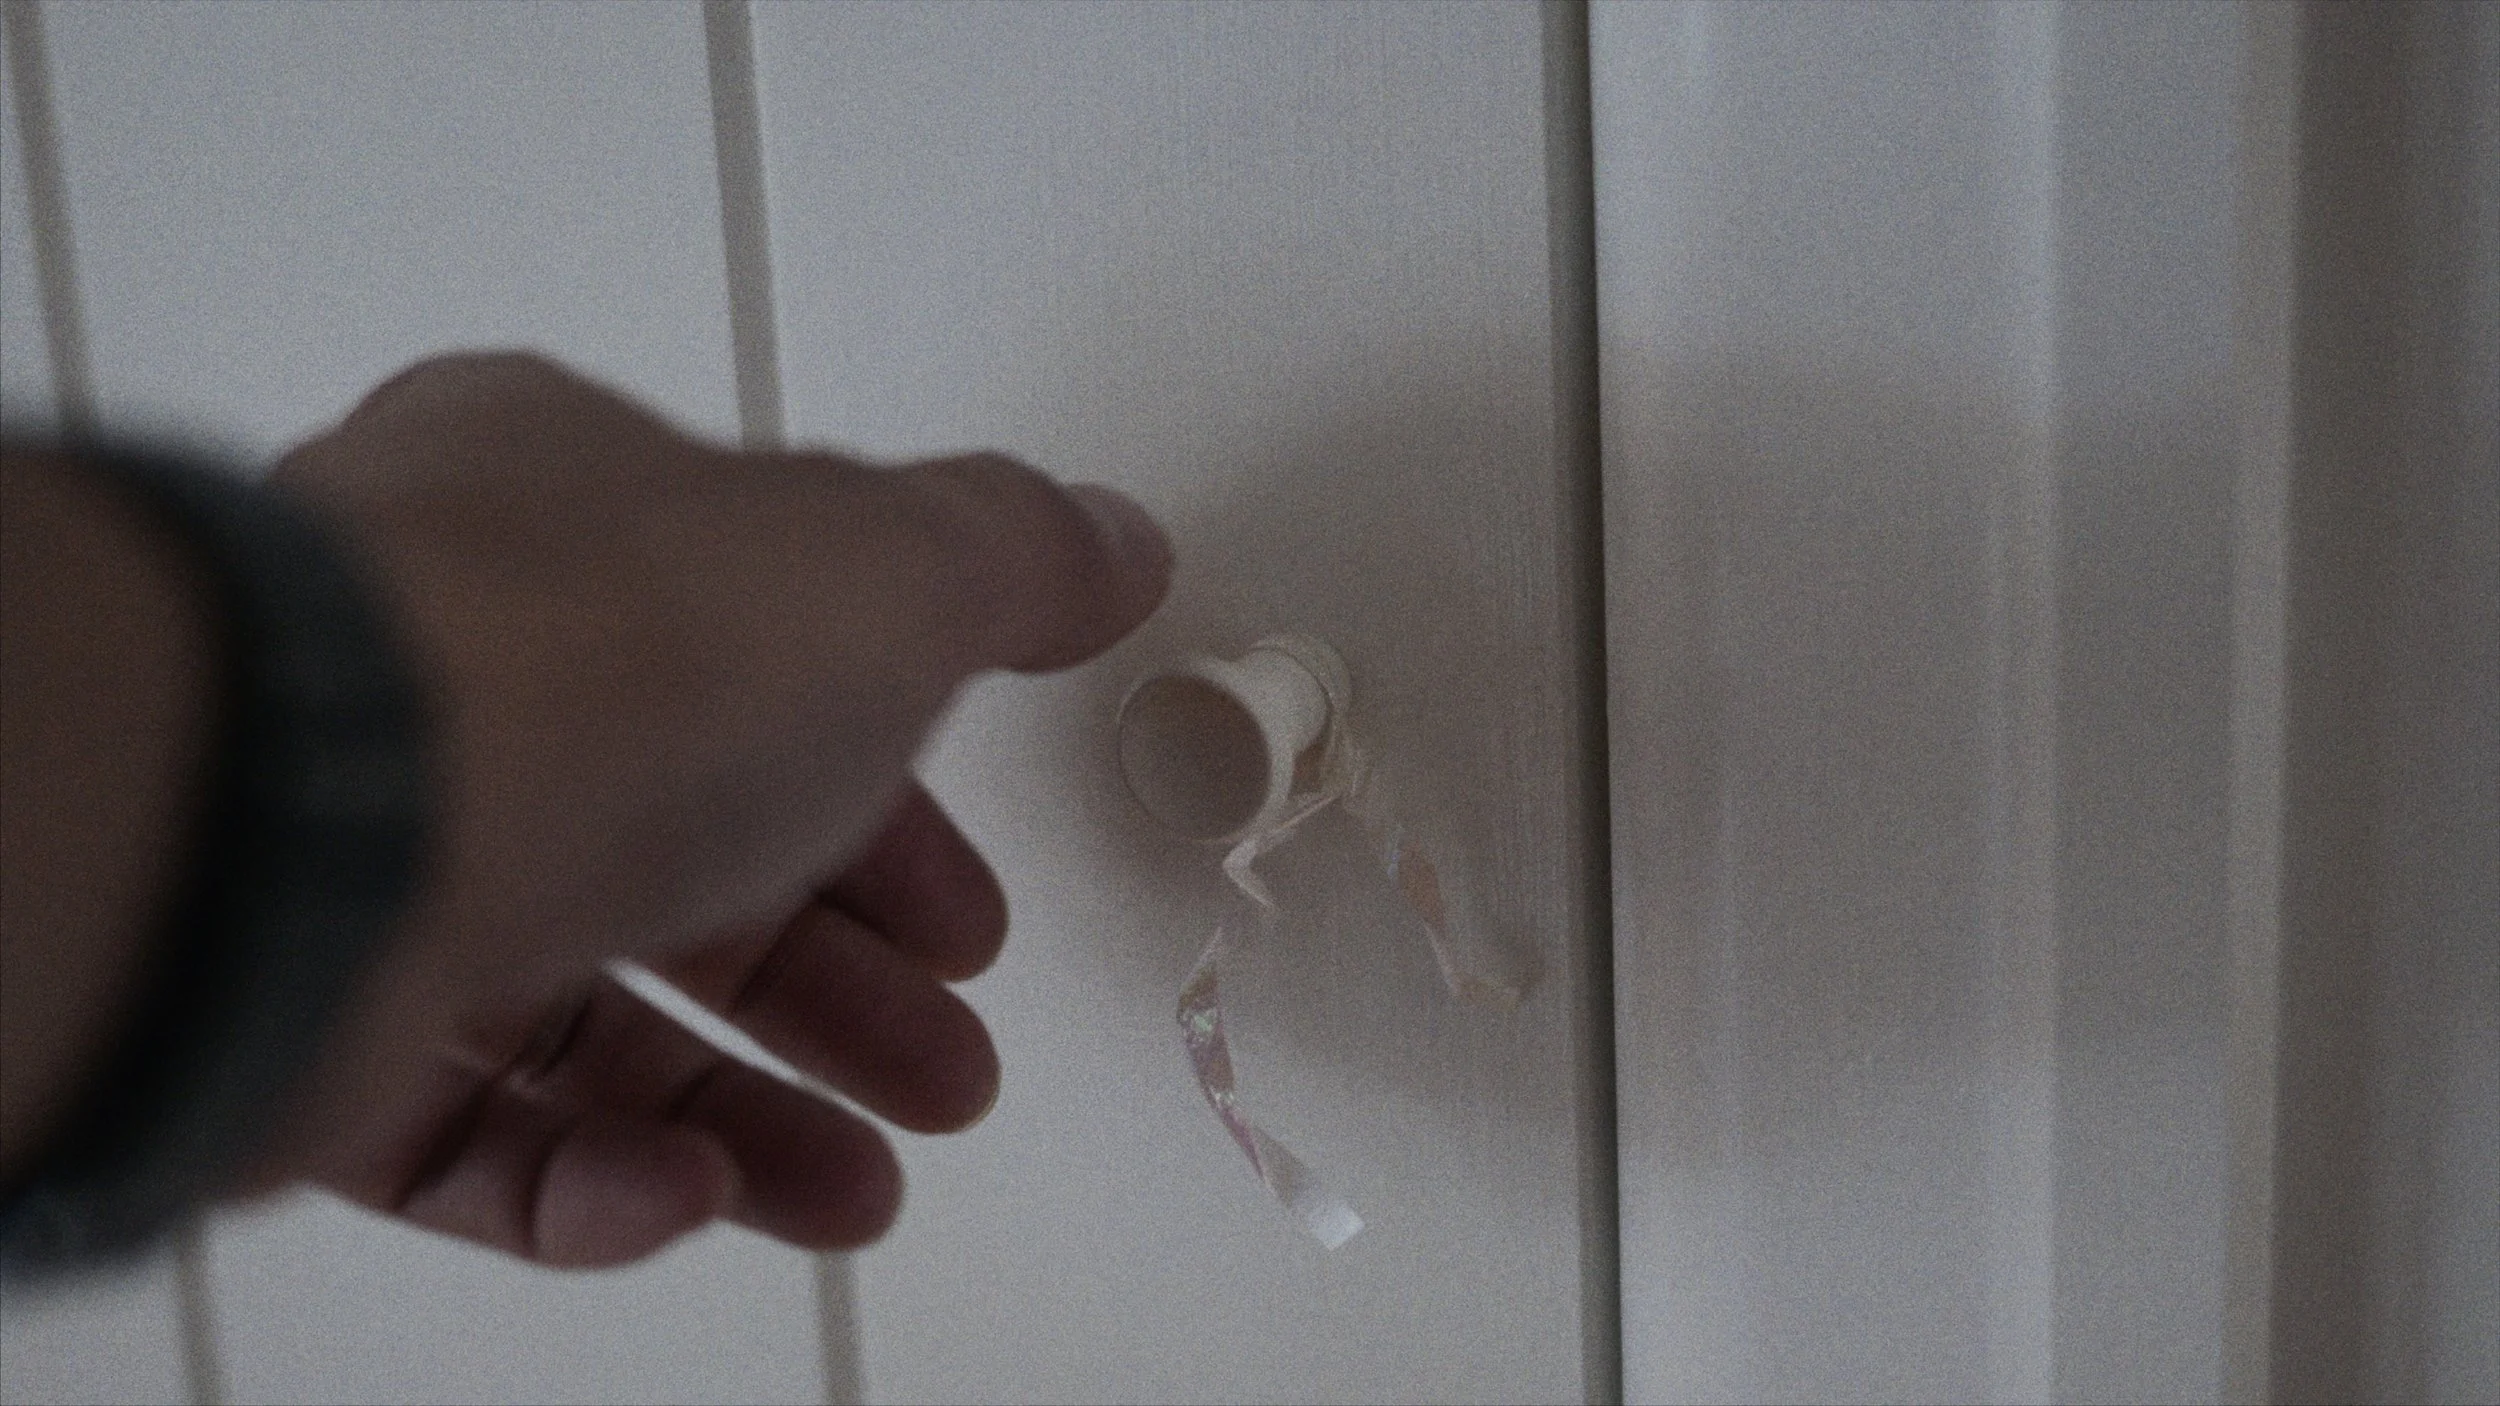
A power outlet somewhere in the closet helps, you can drill holes in the shelves like I did to pass power cords through.
Alternatively you can run everything through these Smallrig V-mount batteries.
If the closet shelves don’t sit flush against the door, a little bit of clearance helps with mounting the light fixtures and the angle of the beam of light as it bounces.
Use a more powerful light than you think you need. Every time the light bounces it loses some intensity, and even though this is a 200Watt light I’m only using it at 10% intensity most of the time. It means the fans it has also don’t kick in when it’s being under-utilised.
Use Case 2: Online Calls/Meetings
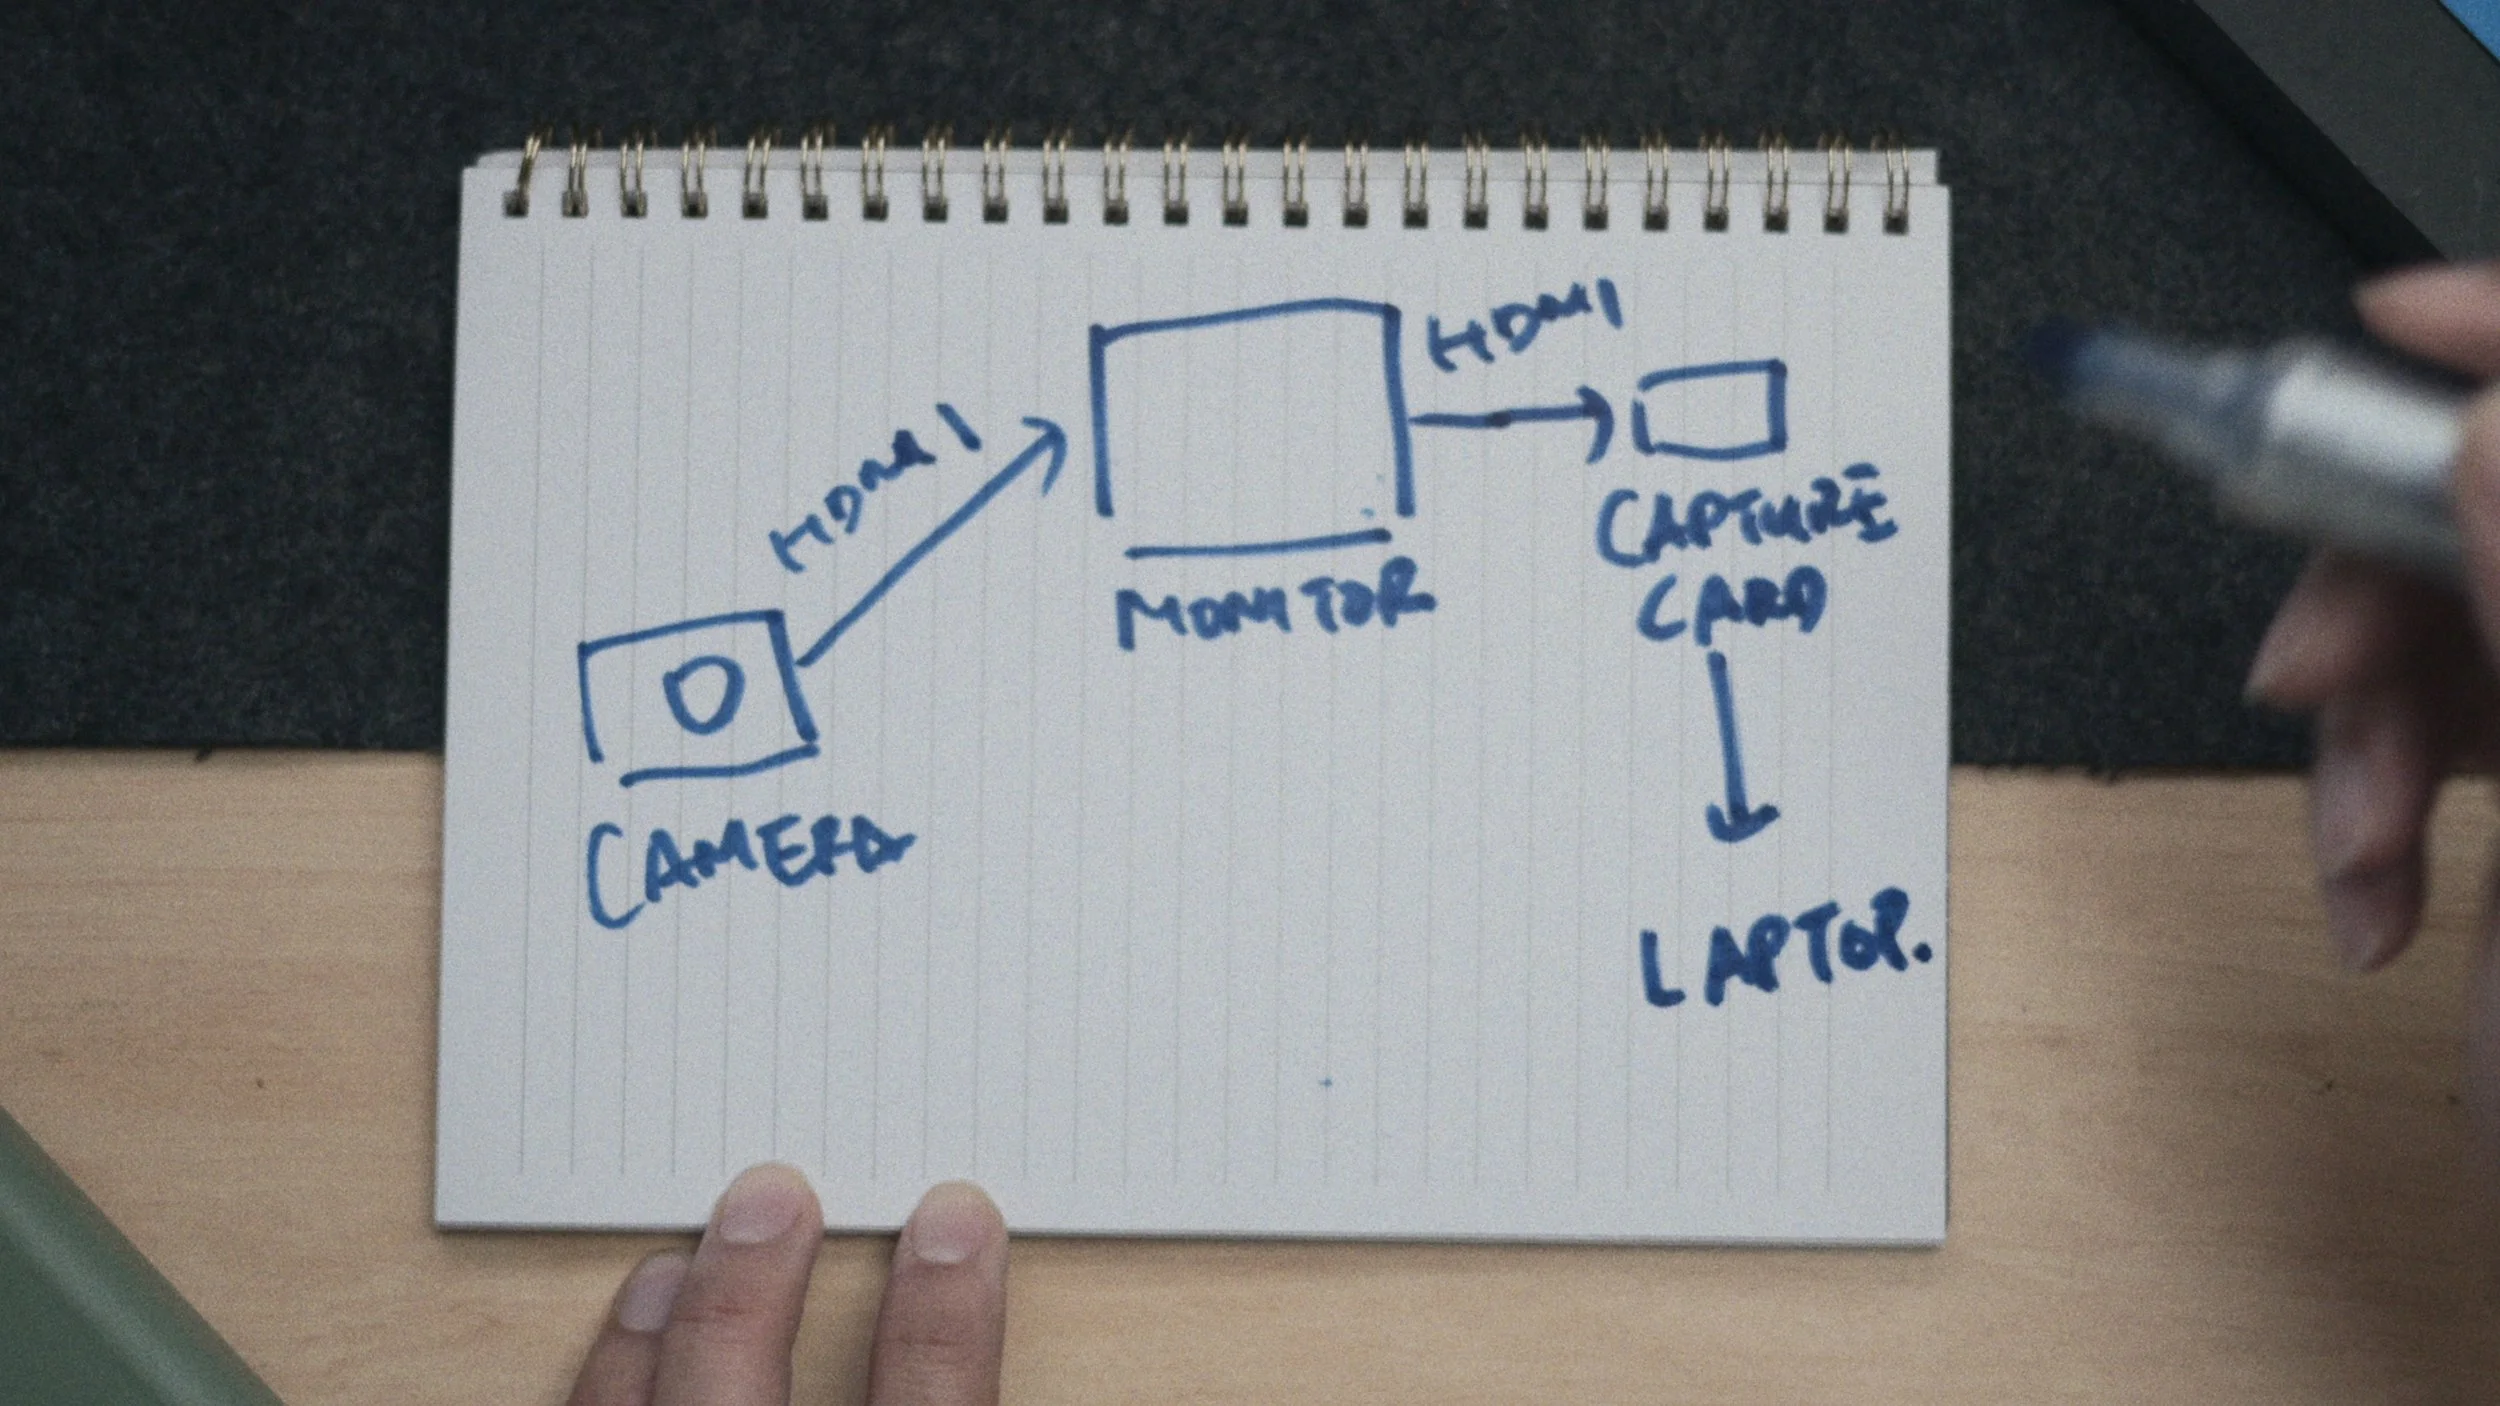
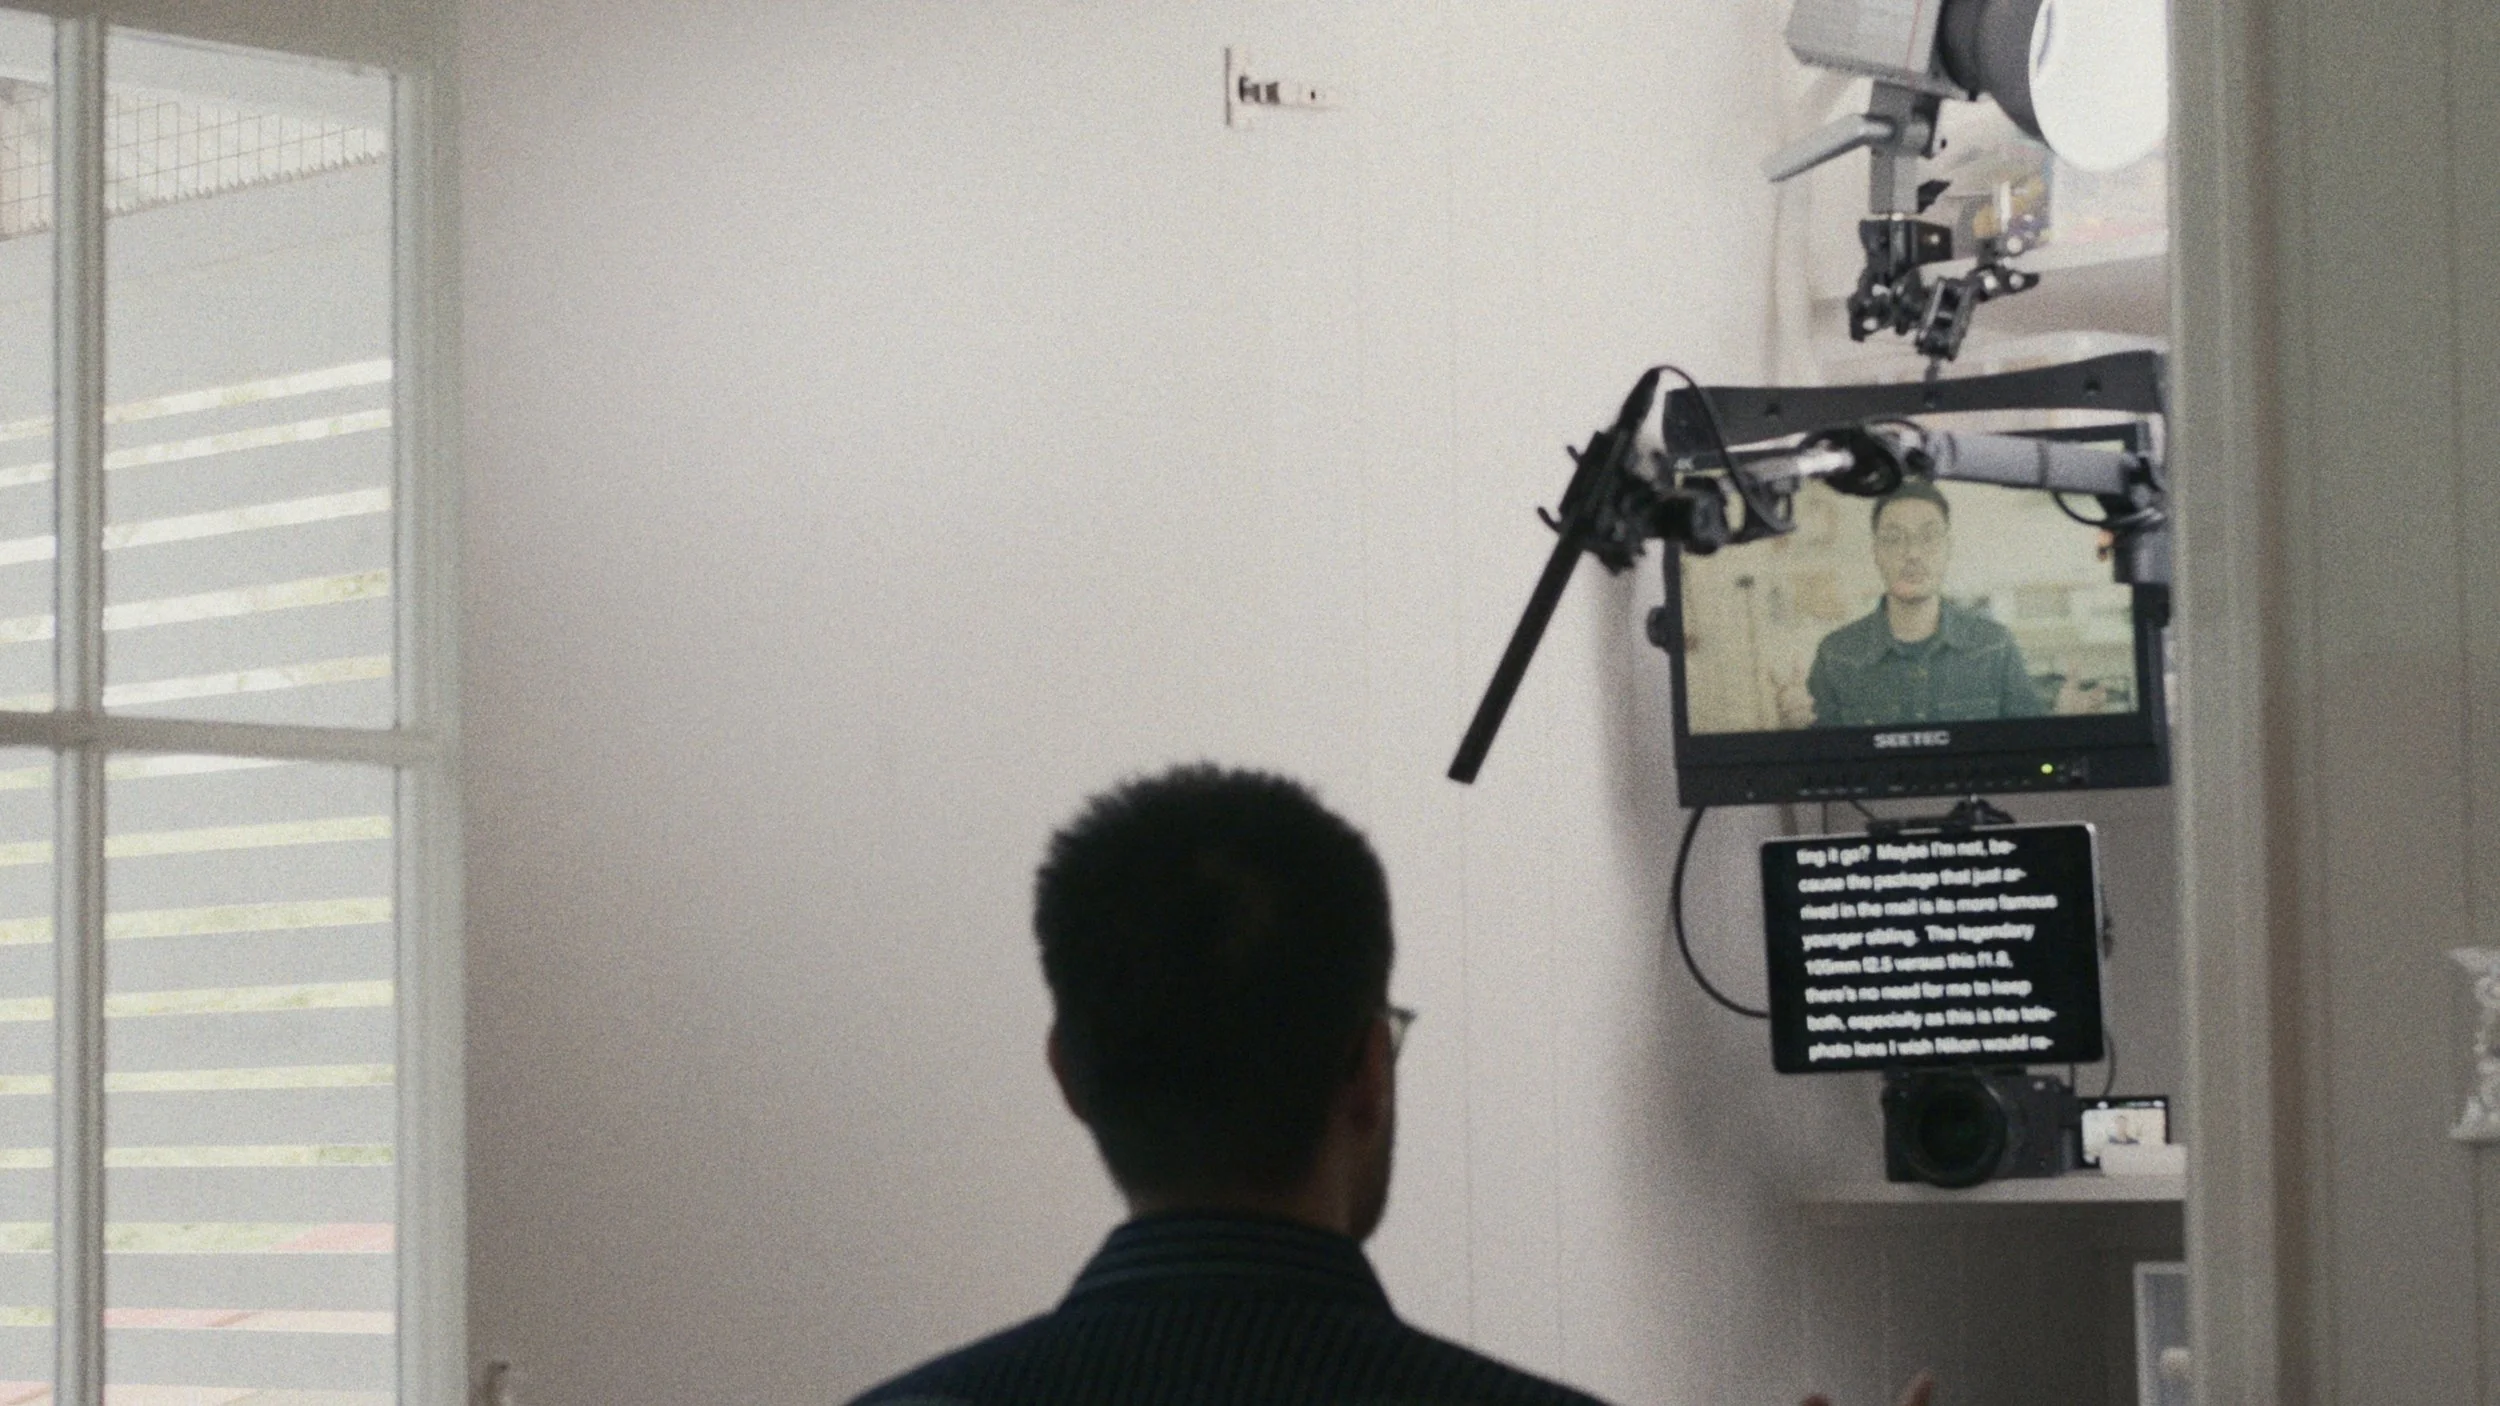
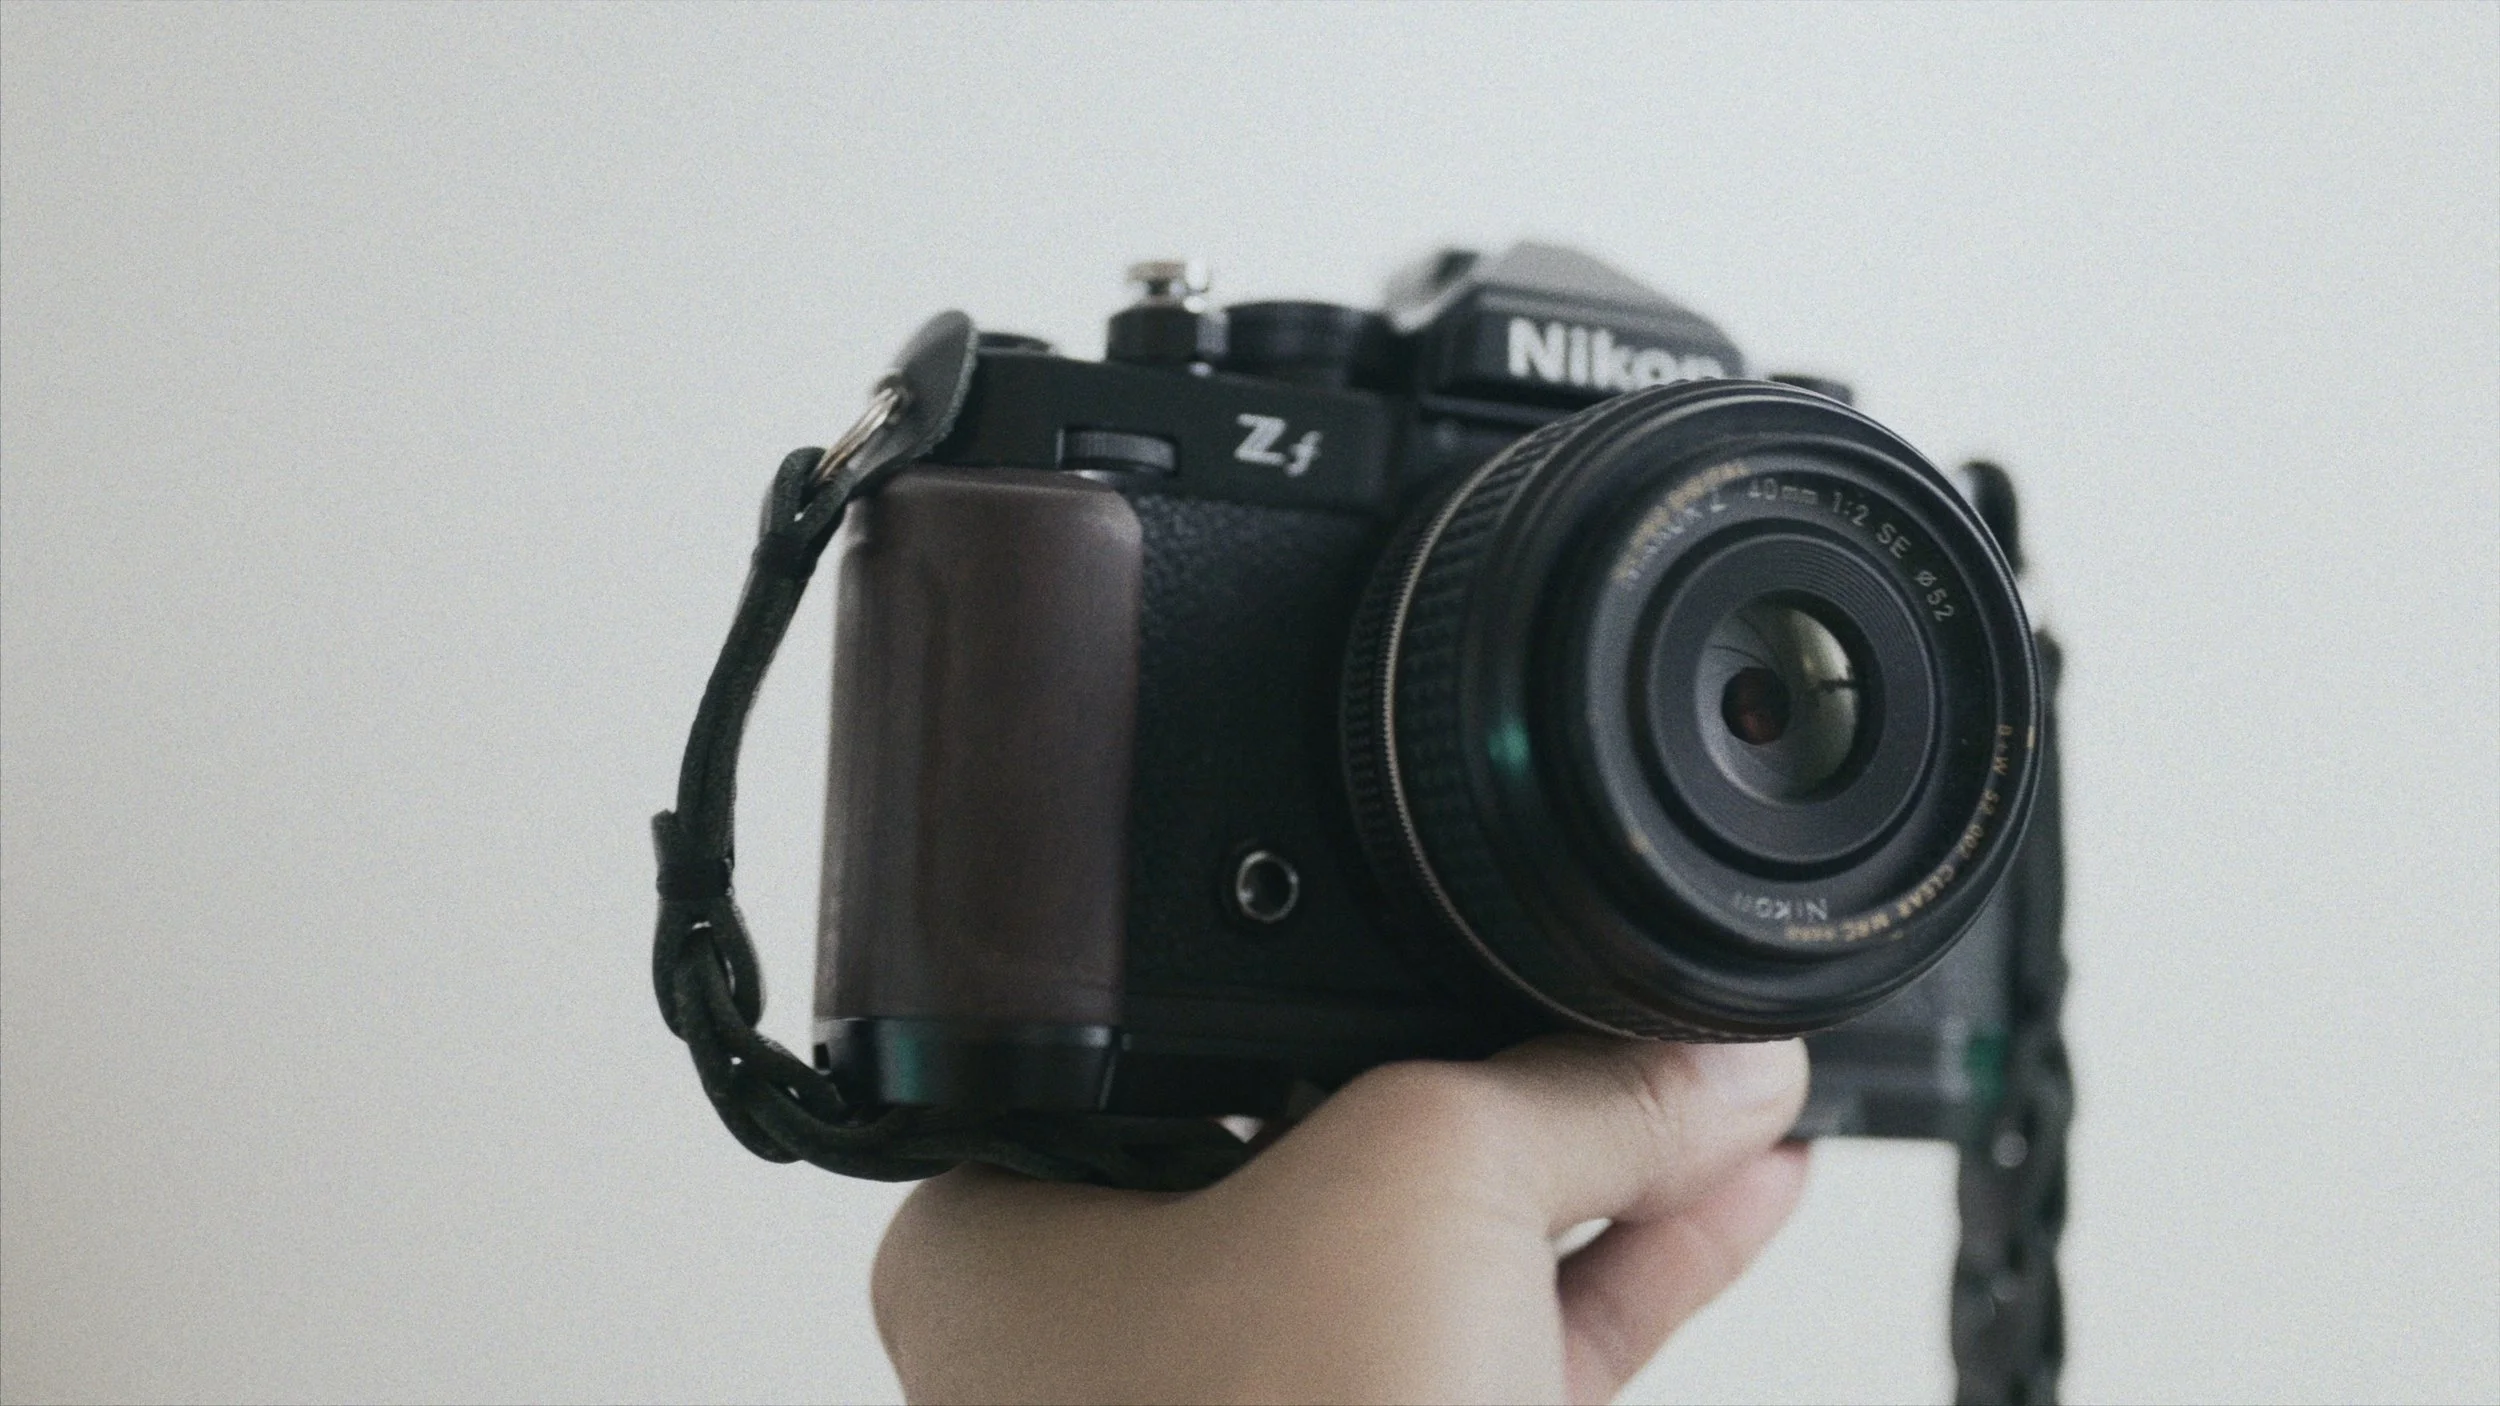
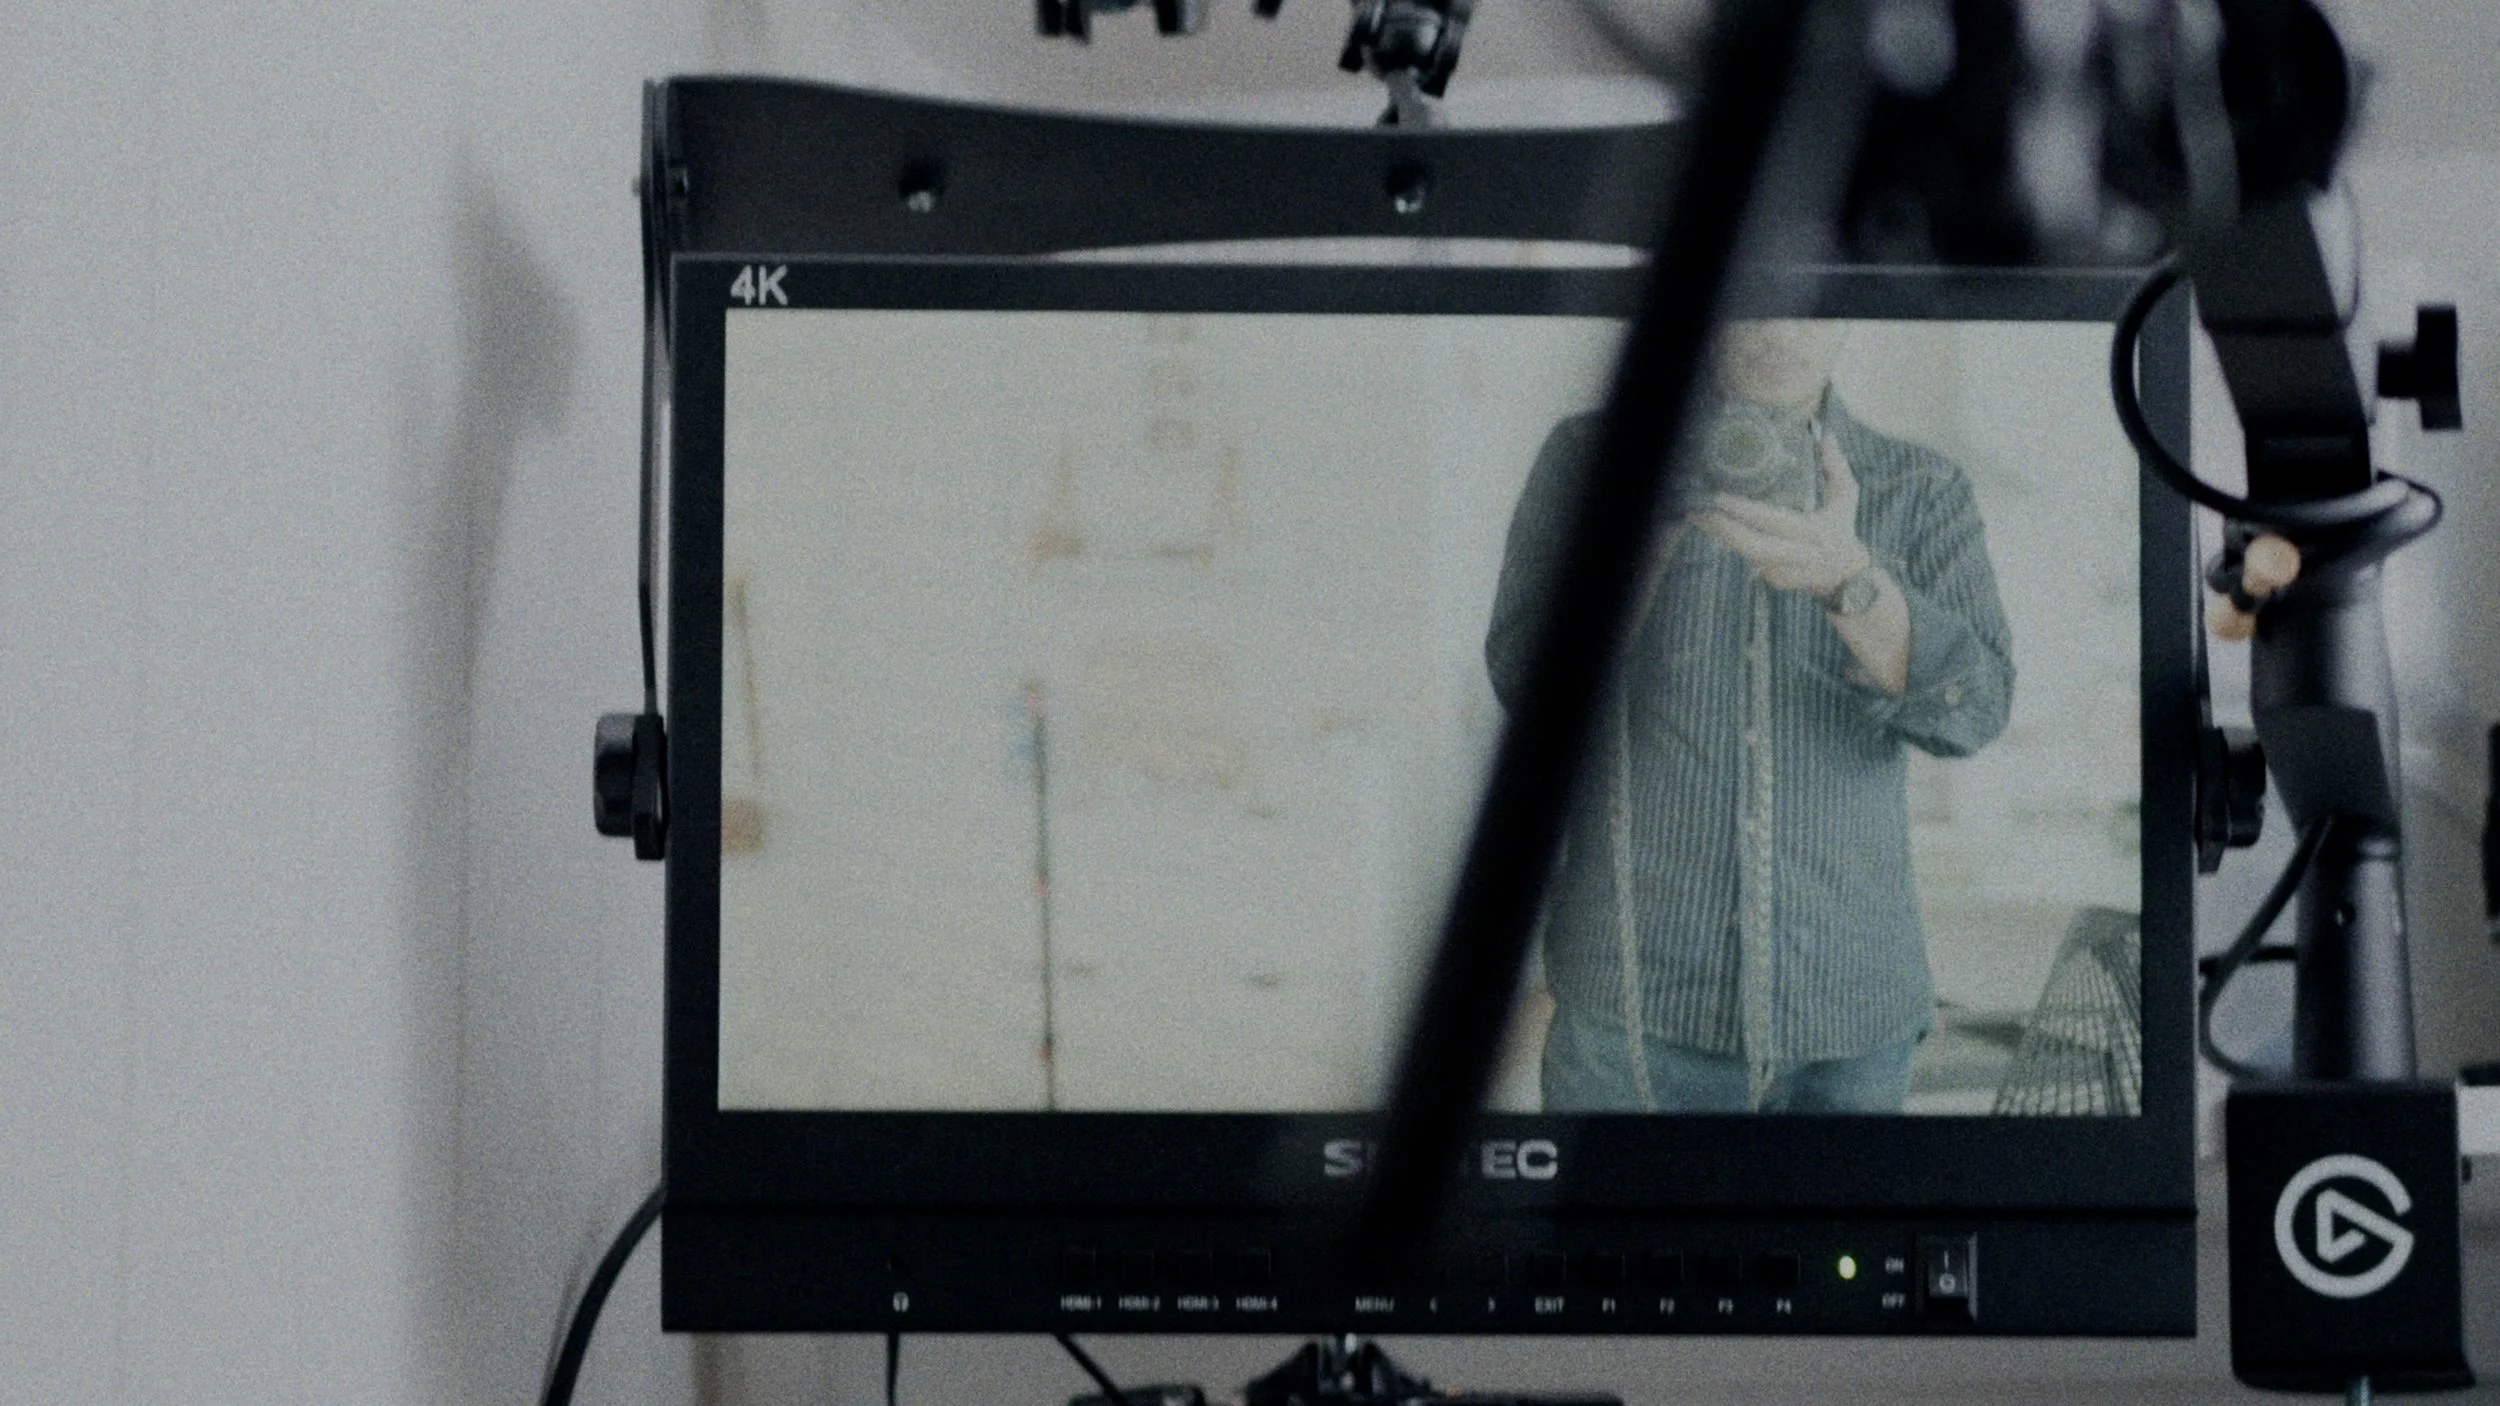
Fan noise doesn’t matter for product photography, but it does matter for Zoom/Teams calls and online meetings. A lot of these happen very early in the morning or late at night, so having a predictable source of light helps give me a high-end professional look. You could simply put your laptop in the closet, raise the webcam to eye level by putting it on a closet shelf at the right height, but I use a mirrorless camera as my webcam. HDMI out cable connected to a capture card, which converts the livefeed from my camera into a webcam input on my computer.
You can simply put the camera on a shelf with a height that best matches your eye line when filming. The light bouncing off the closet door lights one side of your face and wraps around like classic Rembrandt lighting.

Light bouncing from inside the closet is what’s lighting my face in this shot.
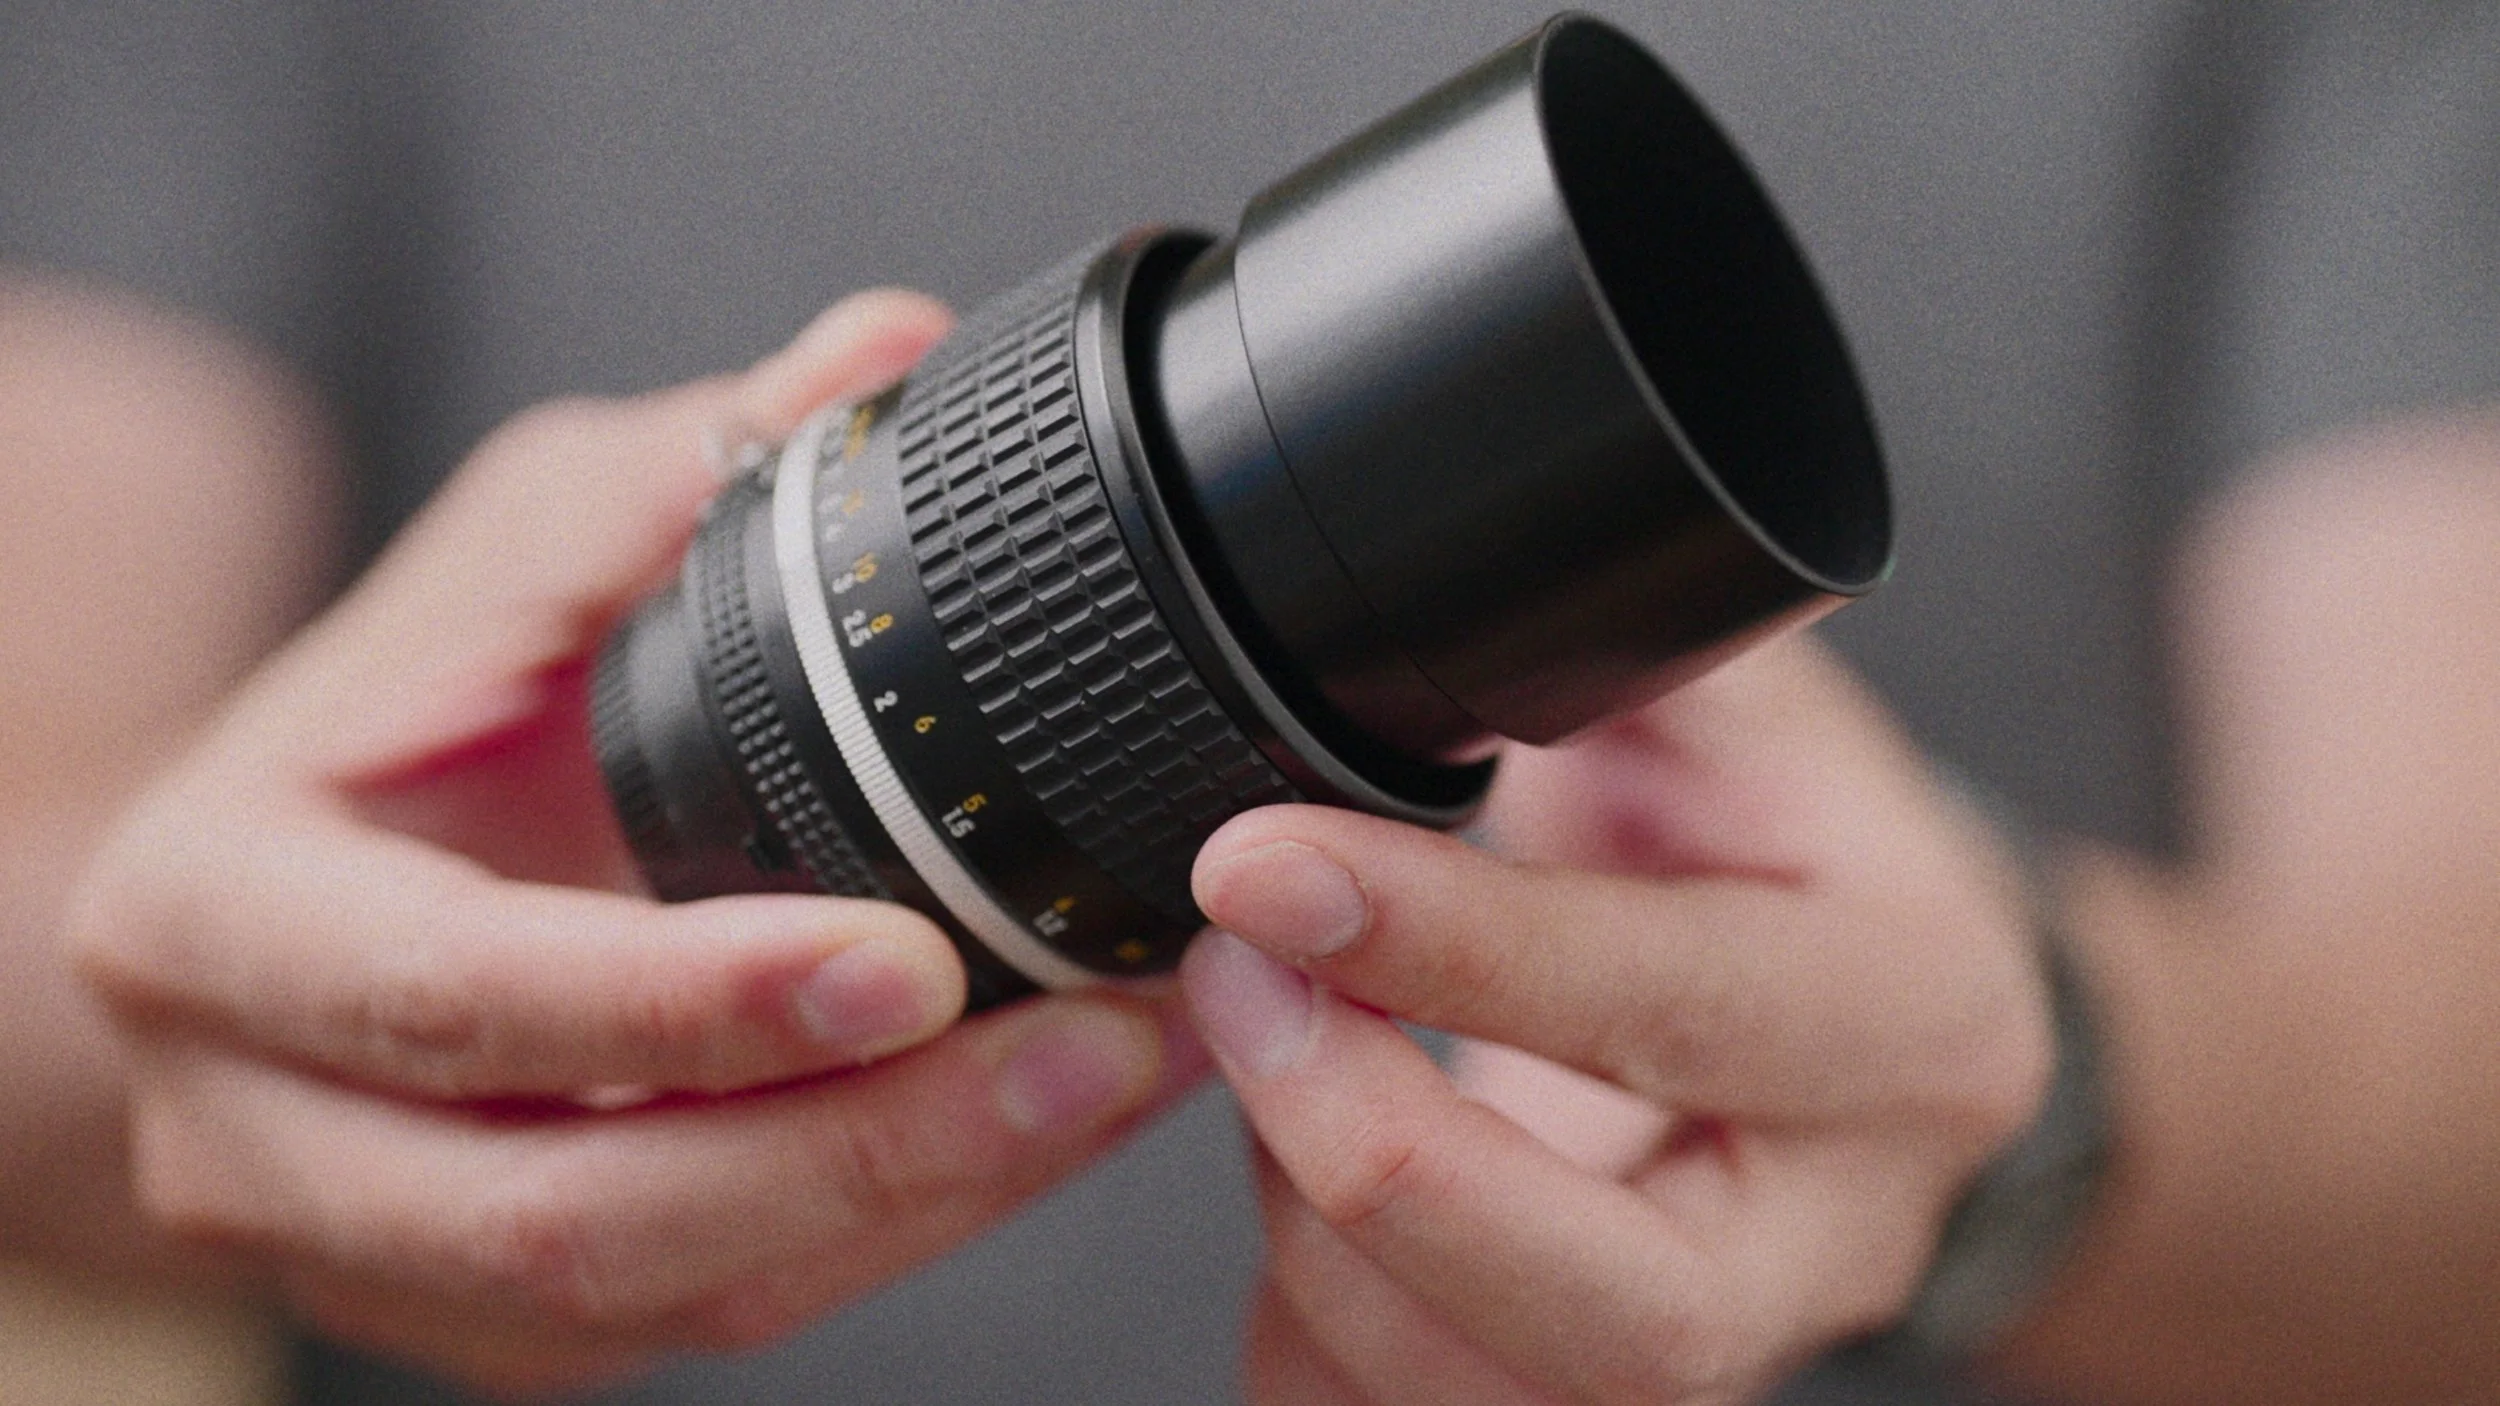
I also used a superclamp to secure the camera to the shelf once I figured out my main angle, ideally you want to shoot into a corner, and have two sides of the frame look different for visual contrast. If you want to mount your camera to a closet shelf, like me, anything wider than a 35mm lens will catch the corners of the closet so I prefer to use a 50mm. This means I’m a little further away from the camera, which solves 1 problem while creating another.
What problem does a 50mm solve?
I can have my notes sitting just above the camera on an iPad, and the parallax and working distance of a 50 makes it seem like I’m still looking into the lens.
But the problem a 50mm creates for video?
I’m further away from the camera, which means any mic I use needs to cover that distance. You can use a wireless mic - Rode, DJI both make really small options, but I personally like to use XLR microphones, which means I need an audio interface that accepts XLR cables. This is why having a power outlet in the closet is handy - I can power my laptop and the audio interface while the meeting’s going, OR if your camera has an XLR adapter like my Sony FX3 then you can plug the mic directly into that.

Normally I love my podcast microphones for video, but for this setup a shotgun mic works better. I can mount it to an Elgato low profile microphone arm that’s designed for clamping to your desk, but this time I’m clamping it to a closet shelf. My shotgun mic - I use the Sennheiser MKH416, but any shotgun will do really - is longer and lighter, which means it can reach closer to me, about 10 cm away, just out of frame, for great quality audio.

This is a pretty minimal setup, so technically you can still use a part of it as a closet, and the best part is any clothes you store in the closet will dampen the echo and reverberation, which only improves your audio quality.
My lights, camera, microphone, ipad, laptop, is all being charged inside the closet, and all packs away when the zoom call is done.
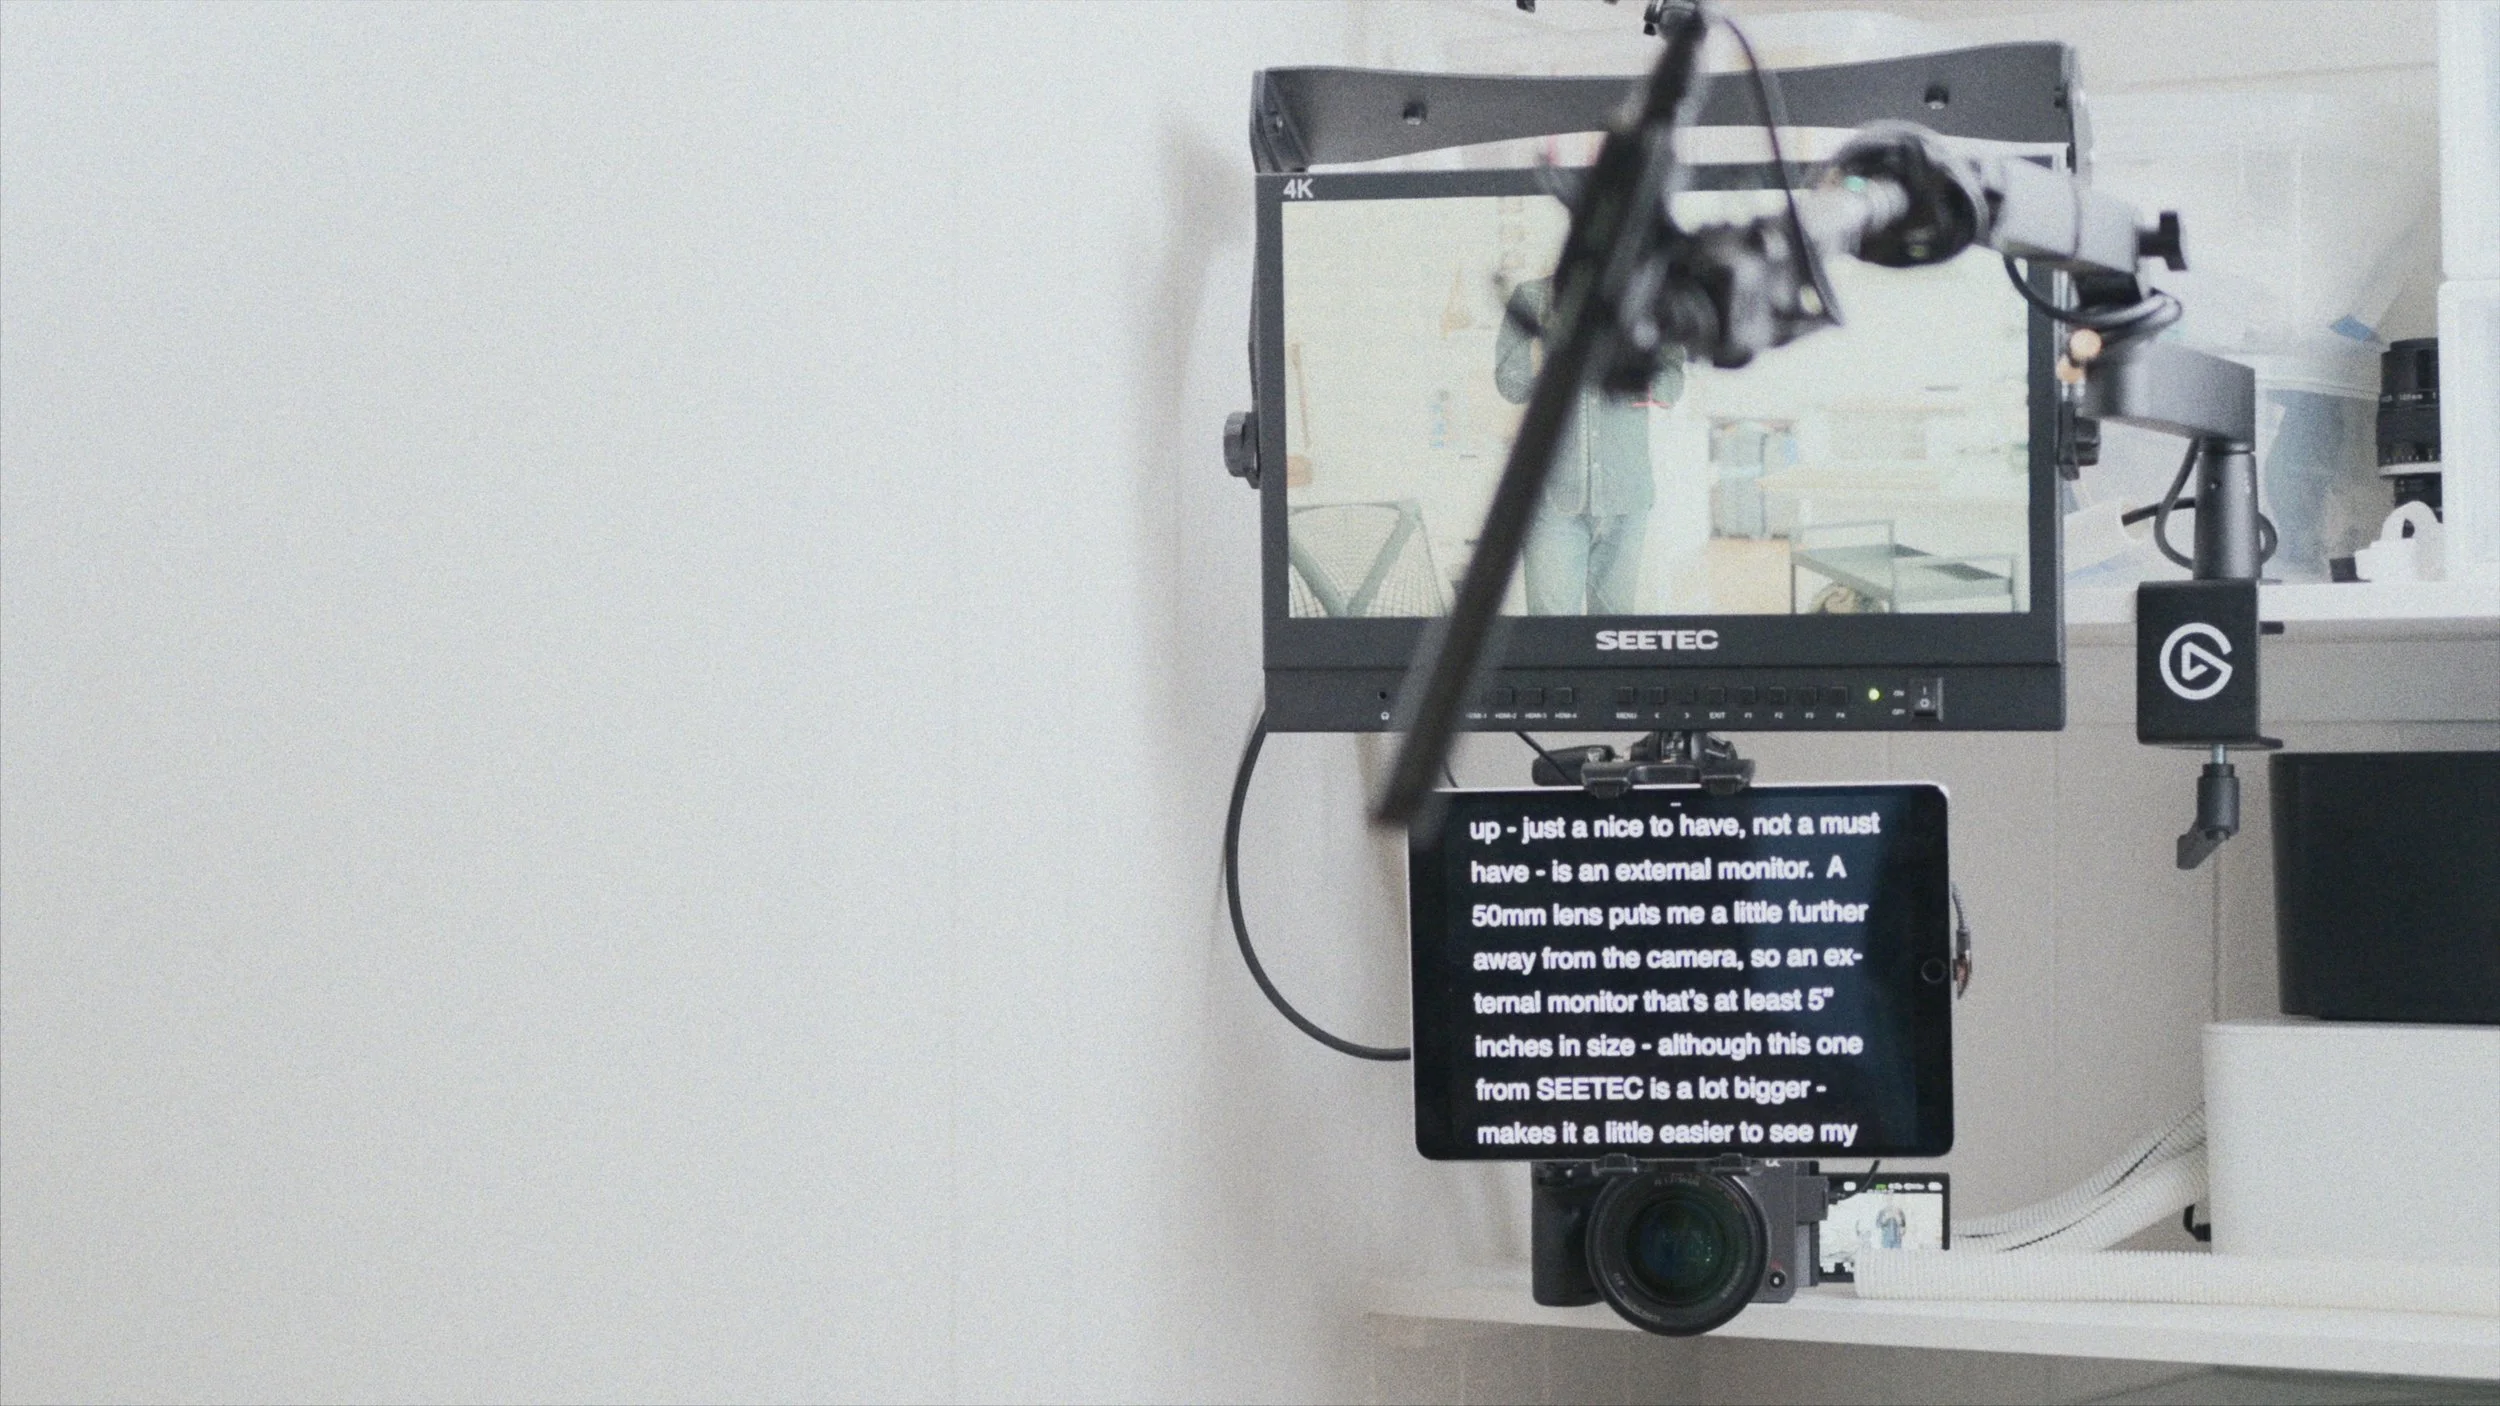
Another tips to streamline this setup - just a nice to have, not a must have - is an external monitor. A 50mm lens puts me a little further away from the camera, so an external monitor that’s at least 5” inches in size - although this one from SEETEC is a lot bigger - makes it a little easier to see my composition. Color accuracy doesn’t matter too much for this application, but HDMI out is useful - you can run your camera into monitor, and the monitor into a capture card then to your computer. This tip is especially handy for my third and final use case:
Use Case 3: Video Production.
For filming talking head A-roll, I can load up my notes and script on the iPad, see my framing in the monitor, and start recording high quality audio and video in less than a minute - just open the closet door, the lighting’s nice and soft, everything’s dialled in.
For filming B-roll I can either use the same angle - and just hold things up to the camera, or I can use the bounced light to a nearby table to film top down shots without needing to setup an extra light.

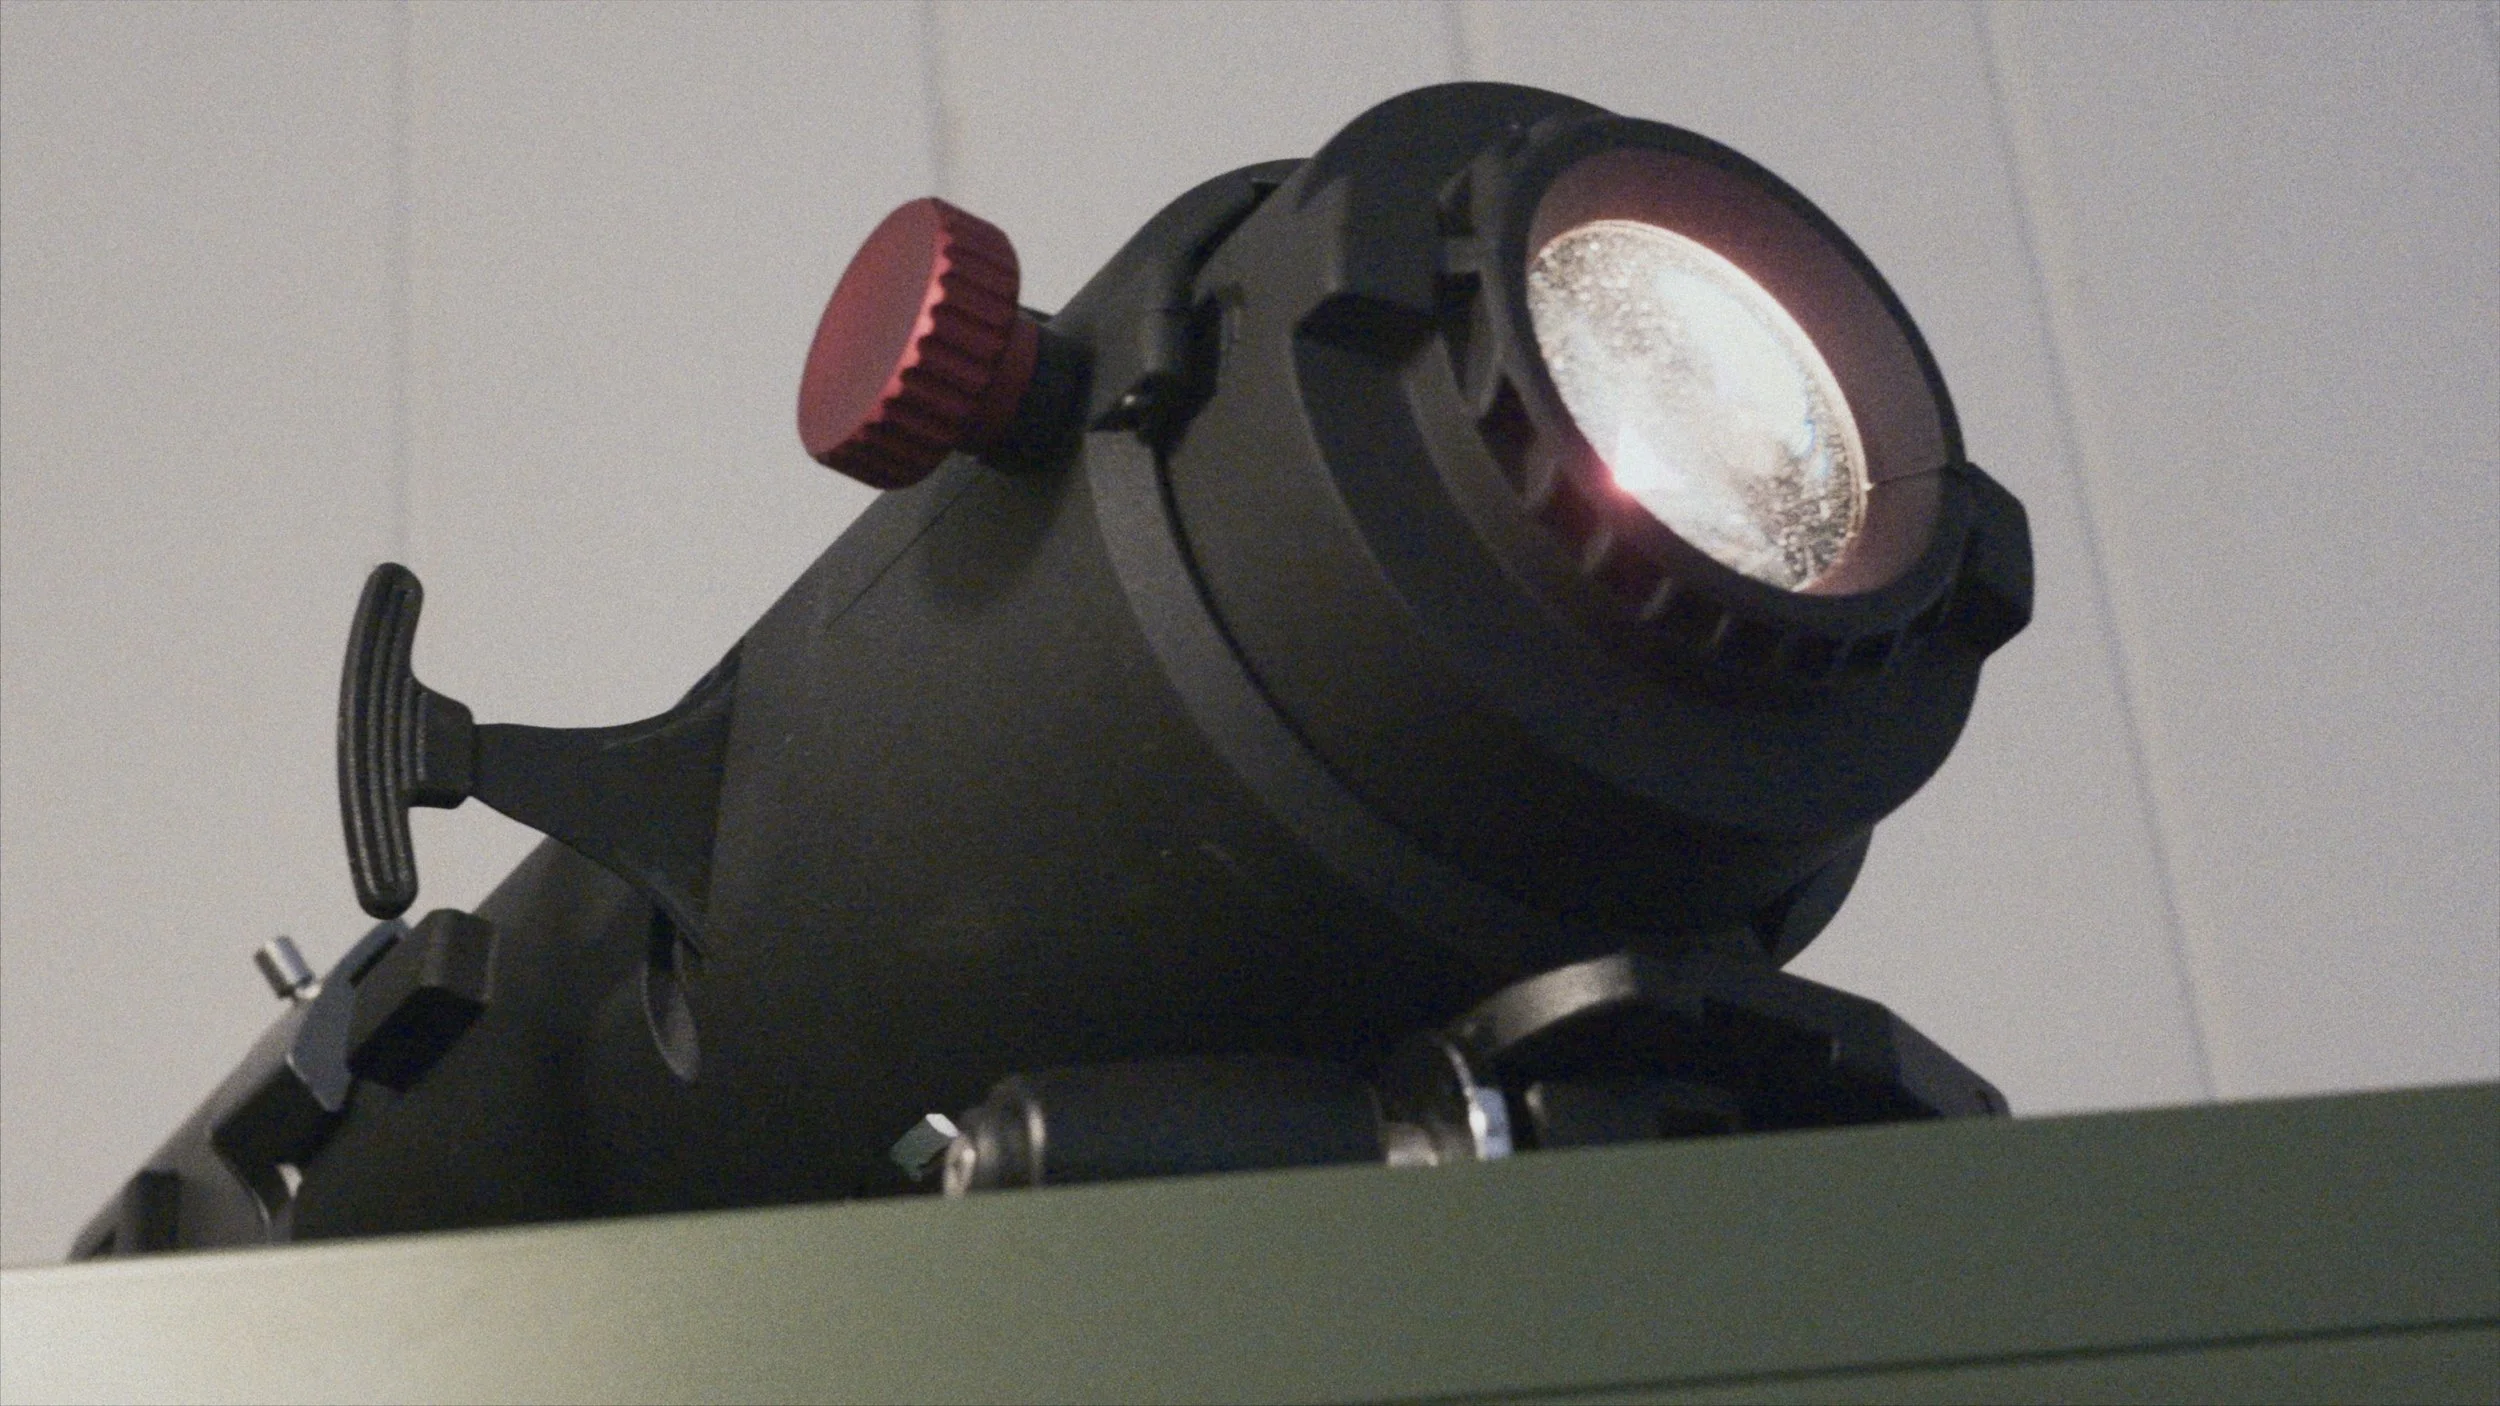
I do have some extra lights set up outside of the closet to create more texture in the frame - a spotlight mini with a gobo to project this pattern, some tube lights to add some ambient light into the background. But it all starts with the light that’s inside this tiny closet.
My full studio remake is under way but this setup has made me rethink how minimalist I can make my new studio when it’s ready to go?
Happy shooting everyone, talk soon.
Jack.
Want to support the channel? Affiliate links for my photography and videography gear can be found here.